• Industry Solutions
    • Managed Service Providers
    • Enterprise Solutions
    • Developers & Startups
    • Healthcare
    • Trading and Financial
      • Chicago Managed Trading Servers
      • Trading and Financial Colocation: Chicago & New Jersey
    • IBM AS/400 and iSeries Users
  • Support
    • Register
    • View Tickets
    • Submit a Ticket
    • Knowledgebase
    • News
  • Steadfast Blog
  • Steadfast Podcasts
  • Contact Us
Home
  • Call Us
  • Call | 888.281.9449
  • Login
  • Search

This form logs you into your management portal account. To access your help desk account, click here and use the form to the right of the news.

  • Cloud Hosting
    • Cloud Hosting
    • Private Cloud
    • Hybrid Cloud
    • Public Cloud
    • Cloud Storage
      • Secure File Share
      • Wasabi Cloud Storage
    • Virtual Data Center Platform
  • Managed Hosting
    • Bare Metal Dedicated Servers
      • Deep Learning GPU Dedicated Servers
      • Linux Dedicated Servers
      • Windows Dedicated Servers
    • Virtual Private Servers
    • Data Center Colocation
      • Managed Colocation
      • Chicago: 350 E Cermak
      • Chicago: 725 S Wells
      • Edison, New Jersey
    • Security & Compliance
      • Managed Firewall
      • SSL VPN
      • DDoS Protection
      • Email Security
  • Backup & Disaster Recovery
    • Backup
    • Disaster Recovery
    • Veeam Backup & Replication
    • Veeam Cloud Connect
    • Wasabi Cloud Storage
  • Why Steadfast
    • Why Steadfast?
    • About Steadfast
      • Our History
      • News and Press
    • Data Centers & Network
      • Our Data Centers
      • Our Network
      • Network Test
      • Peering Policy
    • Customer Stories
    • Service Level Agreement
  • Industry Solutions
    • Managed Service Providers
    • Enterprise Solutions
    • Developers & Startups
    • Healthcare
    • Trading and Financial
      • Chicago Managed Trading Servers
      • Trading and Financial Colocation: Chicago & New Jersey
    • IBM AS/400 and iSeries Users
  • Support
    • Register
    • View Tickets
    • Submit a Ticket
    • Knowledgebase
    • News
  • Steadfast Blog
  • Steadfast Podcasts
  • Contact Us
Close
  • Support Home
  • Register
  • Submit a Ticket
  • Knowledgebase
  • News
 Login Subscribe

Log into the help desk to manage support tickets.


Lost password

Subscribe to general maintenance announcements and advisories.


 Knowledgebase
39Steadfast Cloud Platform 3Full Management 38Dedicated Servers & Colocation 4Control Panels 19Other
Search
Knowledgebase : Dedicated Servers & Colocation
Pre-sales
 
Accessing Dedicated Server IPMI

This article explains how to use IPMIView to access IPMI for dedicated servers equipped with this feature. IPMI allows you to control the power status of your server and to view and control the screen, keyboard and mouse of the server. IPMIView is a suitable alternative to accessing the web-based interface and avoids various Java security warnings and errors that may otherwise appear. Like with the web-based IPMI, you must first be connected to the Internal Network VPN as described in this article.

This software will only work properly for certain servers if used with the Java 7 JRE. Version 1.7.0_79 is bundled with the current packages dated 20151223. If you try to change the Java version included with the downloads, IPMIView may no longer function as expected.

Software Download & Installation

You can download a copy of the IPMIView software from here:

  • http://mirror.steadfast.net/misc/IPMIView/

Currently the software is supported for Windows, MacOS X, and Linux.

IPMIView is also available for iOS and Android devices, but it has not been tested extensively:

  • iOS: https://itunes.apple.com/us/app/supermicro-ipmiview/id952163566?mt=8
  • Android: https://play.google.com/store/apps/details?id=com.smc.smcipmitool

Windows Installation

Download the Windows installer here and run it.

The installation will create a program group called SUPERMICRO on the Start Menu.

You must use the Run as Administrator option for the interface to load properly.

Linux Installation

Download the appropriate tar file, depending on your OS architecture:

  • 64-bit: IPMIView_V2.11.0_bundleJRE_Linux_x64_20151223.tar.gz
  • 32-bit: IPMIView_V2.11.0_bundleJRE_Linux_20151223.tar.gz

Extract the downloaded file from a terminal window and switch to the extracted directory:

tar -xzf IPMIView_V2.11.0_bundleJRE_Linux_x64_20151223.tar.gz
cd IPMIView_V2.11.0_bundleJRE_Linux_x64_20151223

Then run the following command to start the program:

./IPMIView20

Mac OS X Installation

Download the MacOS file here.

Extract the downloaded file from a terminal window and switch to the extracted directory:

tar -xzf IPMIView_V2.11.0_bundleJRE_MacOS_x64_20151223.tar.gz
cd IPMIView_V2.11.0_bundleJRE_MacOS_x64_20151223

Then run the following command to start the program:

./IPMIView20

Note that this download was produced by Steadfast and is not supported by Supermicro.

Official Downloads

The original official download location of the software is the Supermicro FTP site:

  • ftp://ftp.supermicro.com/utility/IPMIView/

Usage

To access an IPMI console, you must add the system, then log in and select the KVM Console tab. This series of screenshots provides an illustrated step-by-step process:

  1. Start the application and select the Ipmiview-2-button-new.png (New system) button from the toolbar:
    Ipmiview-1-toolbar.png

  2. Enter a Name and IP for the system you are adding. Please note that the values below are an example. You must enter the information for your own server in the boxes.
    Ipmiview-3-addsystem.png

  3. From the IPMI Domain list on the left side of the application, double click the system to be accessed:
    Ipmiview-4-ipmidomainlist.png

  4. Enter the login information for the IPMI controller:
    Ipmiview-5-login.png

  5. Click Login and look for the "Connected" banner, which should look like this:
    Ipmiview-6-connected.png

  6. Once logged in, select the "KVM Console" tab from the bottom of the application:
    Ipmiview-7-console.png

Please note that the tabs may vary depending on the IPMI controller hardware.

If you have any trouble using IPMIView, please contact support and let us know the steps you have taken and any error messages you have received.

Adding IPv6 Addresses to Dedicated Servers
Please note that these directions assume your server is either already configured with a Main IPv6 Address or that you have visited http://steadfast.net/ipv6-me/ to obtain the correct information.


Activating IPv6 addresses varies by operating system. Please find the section below for the operating system installed on your server and follow the directions carefully to ensure the IPs are properly configured. If your operating system is not listed here, you will need to consult your OS documentation for instructions on configuring IPv6 addresses. We cannot provide IP configuration support for unsupported operating systems.

If you are experiencing difficulty for any reason, please open a new ticket with the IPs department, and include the information necessary to log into your server remotely. We'll be happy to assist you in adding the addresses to your server.

In the sections below, replace the bracketed text (remove the brackets) with the information provided above. The value of the Prefix Length is the number after (not including) the slash in your IP range.

The Address may be anything within your assigned block besides the router address. For more information on IPv6 formatting and numbering, please see:

http://en.wikipedia.org/wiki/IPv6_address

Please note that on Linux, FreeBSD or MacOS systems, you will need to use the "ping6" utility to ping or "traceroute6" utility to traceroute to an IPv6 address. In Windows, the usual "ping" and "tracert" utilities recognize IPv6 addresses.

CentOS, Fedora, Red Hat Linux, and variants

Edit /etc/sysconfig/network and update the NETWORKING_IPV6 line to read:

NETWORKING_IPV6=yes

Edit /etc/sysconfig/network-scripts/ifcfg-eth0 and verify or add the following lines:

IPV6INIT=yes
IPV6ADDR="[Main IPv6 Address]/[Prefix Length]"
IPV6_DEFAULTGW="[Default Gateway]"

If these lines do not exist, see http://steadfast.net/ipv6-me/ for information on determining the correct values.

To add additional IPv6 addresses, insert this additional line in the same file:

IPV6ADDR_SECONDARIES="[Address] [Address]"

You may enter as many as you like, separated by spaces.

Now run the following command to apply the configuration:

/etc/init.d/network restart

Debian, Ubuntu, and variants

Edit /etc/network/interfaces and verify or add the following lines:

iface eth0 inet6 static
address [Main IPv6 Address]
netmask [Prefix Length]
gateway [Default Gateway]

If these lines do not exist, see http://steadfast.net/ipv6-me/ for information on determining the correct values.

To add additional IPv6 addresses, insert this additional line in the same file immediately following the gateway:

up /sbin/ifconfig eth0 inet6 add [Address]

You may include as many lines as you like.

Now run the following command to apply the configuration:

/etc/init.d/networking restart

FreeBSD

Run 'ifconfig' to identify the name of your interface. It is often fxp0 or em0 or nfe0 and almost always ends with a zero.

Edit /etc/rc.conf and verify or add the following lines:

ipv6_enable="YES"
ipv6_ifconfig_[Interface]="[Main IPv6 Address] prefixlen [Prefix Length]"
ipv6_defaultrouter="[Default Gateway]"

If these lines do not exist, see http://steadfast.net/ipv6-me/ for information on determining the correct values.

To add additional IPv6 addresses, insert this additional line in the same file:

ifconfig_lo0_alias0="inet6 [Address] prefixlen [Prefix]"

You may include as many lines as you like, but for each additional line, increment the number after "alias" (such as "alias1", "alias2").

Now run the following command to apply the configuration:

/etc/rc.d/network_ipv6 restart

If you receive the message:

[Default Gateway]%[Interface]: hostname nor servname provided, or not known

Try changing the line in /etc/rc.conf to:

ipv6_defaultrouter="[Default Gateway]"

Then, repeat:

/etc/rc.d/network_ipv6 restart

Windows 2003

  1. Go to Start > Control Panel > Network Connections > Local Area Connection
  2. Click "Properties"
  3. Click "Install", select "Protocol", and click "Add..."
  4. Select "Microsoft TCP/IP version 6" and click "OK"
  5. Click "OK" to close out of the dialog
  6. Go to Start > Run, then type "netsh" and click "OK"
  7. Type "interface ipv6" and press Enter
  8. Type 'add route ::/0 "Local Area Connection" [Default Gateway]', substituting your real router in place of '[Default Gateway]', then press Enter
  9. Type 'add address "Local Area Connection" [Address]', substituting your real IPv6 address in place of '[Address]', then press Enter
  10. If you need to enter additional IPv6 addresses, repeat the previous command for each additional address
  11. When done, type "exit" to exit "netsh"

Windows 2008

  1. Go to Start > Server Manager
  2. Click "View Network Connections" in the "Server Summary"
  3. Right click the connection to edit and select "Properties"
  4. Select "Internet Protocol Version 6 (TCP/IPv6)" and click "Properties"
  5. Select "Use the following IPv6 address"
  6. Enter the requested address information, including the Address, Prefix Length, and Default Gateway.
  7. Enter "2607:f128:1::2" and "2607:f128:1::3" in the Preferred and Alternate DNS Server fields.
  8. If you need to enter additional IPv6 addresses, click the "Advanced..." button and enter them in the upper "IP addresses" section using the "Add..." button.
  9. Click OK to close out of each dialog box.

If you have any problems with any procedures in this article, please feel free to contact support.

Adding Secondary IPs
Please note: We recommend against adding IP addresses using your hosting control panel due to a number of possible issues this may cause. Instead, please try to use the methods indicated below.


Activating IPv4 addresses varies by operating system. Please find the section below for the operating system installed on your server and follow the directions carefully to ensure the IPs are properly configured. If your operating system is not listed here, you will need to consult your OS documentation for instructions on configuring IP aliases. We cannot provide IP configuration support for unsupported operating systems.

If you are experiencing difficulty for any reason, please open a new ticket with the IPs department, and include the information necessary to log into your server remotely. We'll be happy to assist you in adding the addresses to your server.

In the sections below, replace the bracketed text (remove the brackets) with the information provided above. The subnet mask should always be entered as 255.255.255.255 for IPv4 aliases. Using other netmasks may cause some of the addresses to be unusable or interfere with communication to other servers.

CentOS, Fedora, Red Hat Linux, and variants

Create a new file at /etc/sysconfig/network-scripts/ifcfg-eth0-range:1. If this file exists, please use the next available number after the colon (such as ifcfg-eth0-range:2).

nano /etc/sysconfig/network-scripts/ifcfg-eth0-range:1

Insert the following lines into the file:

IPADDR_START=[Start IP]
IPADDR_END=[End IP]
CLONENUM_START=1
NETMASK=255.255.255.255

CLONENUM_START indicates the alias number to start with, so if you already have IP aliases on your server, you will need to increase it to the next available alias number. To find the currently active alias numbers, run the command "ifconfig | grep eth.:" which will list all current aliases in use in a form similar to "eth0:X" where "X" is the alias number. If the command does not output anything, you have no active aliases currently and can safely use the number 1.

Save the file by pressing Ctrl+X, hitting Y to confirm, and Enter to save. Now run the following command to apply the configuration:

/etc/init.d/network restart

Debian, Ubuntu, and variants

Edit the network interfaces configuration file:

nano /etc/network/interfaces

Look for your "iface eth0" line. If the previous line says "allow-hotplug eth0", change it to read "auto eth0" instead. If you leave "allow-hotplug" in the file, the interface may not come back up correctly when you reload the configuration. If "allow-hotplug" is not present, you do not need to do anything else to this part of the file.

Add the following lines at the end of the file. Replace "X" with the next unused number (starting at 0):

auto eth0:X
iface eth0:X inet static
address [Address]
netmask 255.255.255.255

For each IP address in your range, insert another set of lines, incrementing the value of X. You may include as many addresses as you like.

Save the file by pressing Ctrl+X, hitting Y to confirm, and Enter to save. Now run the following command to apply the configuration:

/etc/init.d/networking restart

FreeBSD

Edit your /etc/rc.conf file.

ee /etc/rc.conf

Find a line that looks similar to:

ifconfig_fxp0="inet 1.2.3.4 netmask 255.255.255.252"

Below this line, insert the following. Substitute "fxp0" with the interface name that was in the line above:

ifconfig_fxp0_alias0="inet [Address] netmask 255.255.255.255"

You may include as many lines as you like, but for each additional line, increment the number after "alias" (such as "alias1", "alias2"). If you have 8 IPs, they should be numbered 0-7.

Now run the following command to apply the configuration:

/etc/rc.d/netif restart && /etc/rc.d/routing restart

Windows 2003

  1. Go to Start > Control Panel > Administrative Tools > Routing and Remote Access
  2. Right-click the entry below "Server Status" in left pane. (It should be something similar to "COMPUTERNAME (local)")
  3. Click "Configure and Enable Routing and Remote Access" If this option is unavailable, skip to step 9.
  4. Click "Next" to begin configuration when the dialog appears.
  5. Select "Custom Configuration" and click "Next"
  6. Select only "LAN routing" and click "Next"
  7. Click "Finish"
  8. When prompted to start the service, click "Yes"
  9. In a few seconds, sub-items will appear below the server name in the left pane. Expand the "IP Routing" item and click on "General"
  10. Right-click on "Local Area Connection" in the right pane and click "Properties"
  11. Switch to the "Configuration" tab and click "Advanced..."
  12. In the upper "IP addresses" section, click "Add..."
  13. Add each IP that you were assigned individually, using a subnet mask of 255.255.255.255 and click "OK".
  14. Repeat the previous step for each IP you are adding. When done, click "OK" on each dialog, including the warning dialog, if it appears.
  15. Close the "Routing and Remote Access" window.

Windows 2008

  1. Go to Start > Server Manager
  2. Click "View Network Connections" in the "Server Summary"
  3. Right click the connection to edit and select "Properties"
  4. Select "Internet Protocol Version 4 (TCP/IPv4)" and click "Properties"
  5. Click "Advanced..."
  6. In the upper "IP addresses" section, click "Add..."
  7. Add each IP that you were assigned individually, using a subnet mask of 255.255.255.255 and click "OK".
  8. Repeat the previous step for each IP you are adding. When done, click "OK" on each dialog, including the warning dialog, if it appears.

If you have any problems with any procedures in this article, please feel free to contact support.

Adding Support Staff Access Using DEB

This document outlines how to utilize DEBs to grant the Steadfast Support Staff access to your server.

This package will work for Debian 9, Ubuntu 18.04, and later versions. Other comparable dpkg-based distributions may work but have not been tested. 

Adding the Steadfast Debian repository

You can install a DEB file on your system to automatically add the repository data to the apt configuration.

Install the steadfast-release DEB. 

wget https://mirror.steadfast.net/debian-steadfast/steadfast-release.deb
dpkg -i steadfast-release.deb


Installing the steadfast-keys DEB

After installing the steadfast-release DEB as above, you can use apt to install the steadfast-keys DEB.

Note: If you already have a /root/.ssh/authorized_keys2 file in place, this action will overwrite it. The existing file will be saved to /root/.ssh/authorized_keys2.orig.

# apt install steadfast-keys
<snip>

Complete!

Note that on the initial install you are prompted to import the GPG key. Verify that the key ID matches the information below:
Key ID: 47c9d9af
and answer "yes". This warning will only occur once.

At this point, the Steadfast Staff Public Keys have been installed to your system at /root/.ssh/authorized_keys2. To update the keys with the most recent list, run "apt update" on your system.

Removing access

If you've been supplied a system and you would like to revoke access for the Steadfast Support Staff to your system, simply remove the steadfast-keys RPM:

# apt remove steadfast-keys
<snip>

Complete!

You can verify that the deinstall took place by checking if the /root/.ssh/authorized_keys2 file still exists.

Adding Support Staff SSH Keys using RPM

This document outlines how to utilize RPMs to grant access to the Steadfast Staff access to your server.

Adding the Steadfast YUM repository

You can install an RPM to your system to automatically add the repository data to the yum configuration.

Install the steadfast-release RPM.  The repository package file is identical for all versions of CentOS.

# rpm -ivh http://mirror.steadfast.net/centos-steadfast/steadfast-release.rpm
Retrieving http://mirror.steadfast.net/centos-steadfast/steadfast-release.rpm
Preparing... ########################################### [100%]
1:steadfast-release ########################################### [100%]

Installing the steadfast-keys RPM

After installing the steadfast-release RPM as above, you can use yum to install the steadfast-keys RPM.

Note: If you already have a /root/.ssh/authorized_keys2 file in place, this action will overwrite it. The existing file will be saved to /root/.ssh/authorized_keys2.rpmorig.

# yum install steadfast-keys
<snip>
Transaction Summary
================================================================================
Install 1 Package(s)

Total download size: 15 k
Installed size: 10 k
Is this ok [y/d/N]: y
Downloading Packages:
warning: /var/cache/yum/x86_64/7/steadfast/packages/steadfast-keys-20210712-1603.noarch.rpm: Header V4 RSA/SHA256 Signature, key ID 47c9d9af: NOKEY
Public key for steadfast-keys-20210712-1603.noarch.rpm is not installed
steadfast-keys-20210712-1603.noarch.rpm | 15 kB 00:00:00
Retrieving key from file:///etc/pki/rpm-gpg/RPM-GPG-KEY-steadfast-2021
Importing GPG key 0x47C9D9AF:
Userid : "Steadfast Networks (Package Signing) <support@steadfast.net>"
Fingerprint: c686 fee8 1733 0bf2 71cd d566 f94c 75d8 47c9 d9af
Package : steadfast-release-2-3.noarch (@steadfast)
From : /etc/pki/rpm-gpg/RPM-GPG-KEY-steadfast-2021
Is this ok [y/N]: y
<snip>
Running Transaction
Installing : steadfast-keys 1/1

Installed:
steadfast-keys.noarch 0:20210712-1603

Complete!

Note that on the initial install you are prompted to import the GPG key. Verify that the key ID matches the information below:
Key ID: 47c9d9af
and answer "yes". This warning will only occur once.

At this point, the Steadfast Staff Public Keys have been installed to your system at /root/.ssh/authorized_keys2. To update the keys with the most recent list, run "yum update" on your system.

Removing access

If you've been supplied a system and you would like to revoke access for the Steadfast Support Staff to your system, simply remove the steadfast-keys RPM:

# yum remove steadfast-keys
<snip>
Removing:
steadfast-keys noarch 0:20210712-1603 installed 15 k

Transaction Summary
================================================================================
Remove 1 Package(s)

Installed size: 15 k
Is this ok [y/N]: y
<snip>
Running Transaction
Erasing : steadfast-keys 1/1

Removed:
steadfast-keys.noarch 0:20210712-1603

Complete!

You can verify that the deinstall took place by checking if the /root/.ssh/authorized_keys2 file still exists.

CentOS 6 Illegal Instruction TLS Bug

*****Warning: CentOS 6 is now EOL. As CentOS 6 will no longer receive security and other important updates, it is highly recommended that you upgrade to an actively supported operating system*****

Starting with CentOS 6.8, a newly introduced update to NSS causes certain applications to be unable to connect via TLS using GCM ciphers on virtual machines. This article describes the technical problem and how to apply the solution.

Symptoms and Detection

This issue affects virtual machines in very specific cases.  It can be reproduced with a very simple connection test:

# curl https://google.com --ciphers ecdhe_rsa_aes_128_gcm_sha_256
Illegal instruction (core dumped)

This will cause other applications to crash with similar error messages when they attempt to connect to a TLS server or serve a TLS client using any GCM cipher. You can verify that the issue is caused by misdetected hardware capabilities, by repeating the same command with NSS_DISABLE_HW_GCM=1 set:

# NSS_DISABLE_HW_GCM=1 curl https://google.com --ciphers ecdhe_rsa_aes_128_gcm_sha_256
<HTML><HEAD><meta http-equiv="content-type" content="text/html;charset=utf-8">
<TITLE>301 Moved</TITLE></HEAD><BODY>
<H1>301 Moved</H1>
The document has moved
<A HREF="https://www.google.com/">here</A>.
</BODY></HTML>

If you use another cipher, there's no problem:

# curl https://google.com --ciphers ecdhe_rsa_aes_128_cbc_sha_256
<HTML><HEAD><meta http-equiv="content-type" content="text/html;charset=utf-8">
<TITLE>301 Moved</TITLE></HEAD><BODY>
<H1>301 Moved</H1>
The document has moved
<A HREF="https://www.google.com/">here</A>.
</BODY></HTML>

Solution

Red Hat and CentOS fixed this issue in NSS Softokn version 3.14.3-23.3.el6_8.  To apply this fix on a system that is experiencing the bug, try the following command:

NSS_DISABLE_HW_GCM=1 yum -y update nss-softokn nss-softokn-freebl

References

This issue has been reported and discussed in a number of places.

  • Original Chromium Report
  • Mozilla Bug Report Containing Patch
  • Red Hat Bug Report
  • CentOS Bug Report
  • Red Hat Errata Release
CentOS 7 Information

This article explains noteworthy differences and improvements between CentOS 6 and CentOS 7 to help in deciding which version to use.

What is CentOS 7?

CentOS 7 is the most recent major release of the CentOS Linux distribution.  It is based on Red Hat Enterprise Linux 7, which is derived from Fedora Linux version 19.  It was first released on July 7th, 2014 and will be supported for 10 years, up through June 30th, 2024.

What's New in CentOS 7?

CentOS 7 includes several major changes that pertain to booting up and managing the system.  It is the first to introduce "systemd" which controls how services are started up, as well as many system settings.  It also includes "firewalld" as a new method of managing the server's firewall.

CentOS 7 also provides updates most common hosting software.  The following table lists the differing versions of commonly-used components between CentOS 5, 6, and 7.

ComponentVersionsNotable Changes in CentOS 7
EL5EL6EL7
Apache HTTP Server 2.2.3 2.2.15 2.4.6 mod_ssl OCSP stapling support, config file logic functions, reduced memory usage. (See 2.4 Release Notes)
PHP 5.1.6 5.3.3 5.4.16 register_globals and safe_mode were removed. (See 5.4 Migration Guide)
MariaDB (replaces MySQL) 5.0 5.1 5.5 Fully compatible with MySQL 5.5. Better performance and extra features. (See Incompatibilities with MySQL and Comparsion with MySQL)
PostgreSQL 8.1 8.4 9.2 New replication features and performance improvements.
Linux Kernel 2.6.18 2.6.32 3.10.0 Performance and hardware support improvements. (See Red Hat Enterprise Linux 7 Kernel Release Notes)
Python 2.4.3 2.6.6 2.7.5 New development features. No user-visible changes.
Perl 5.8.8 5.10.1 5.16.3 New development features. No user-visible changes.
Ruby 1.8.5 1.8.7 2.0.0 New development features. No user-visible changes.
Postfix 2.3.3 2.6.6 2.10.1 See Red Hat Enterprise Linux 7 Postfix Release Notes.
BIND 9.3.6 9.8.2 9.9.4 Performance improvements and bug fixes. (See 9.9.0 Release Notes)
OpenSSL 0.9.8e 1.0.1e 1.0.1e No major changes from EL6. Full TLS 1.2 support is available.
OpenJDK 1.6.0
1.7.0
1.6.0
1.7.0
1.8.0
1.6.0
1.7.0
1.8.0
New development features. No user-visible changes.
Tomcat 5.0 6.0 7.0 New features and higher Java version requirement.

Compatibility

The system has been designed to be backward-compatible with old methods of managing hardware and services, so older software will usually continue to function correctly, even though it cannot take advantage of any new system features.

MySQL has been replaced with MariaDB.  The two database servers are compatible and function the same way.  If your application works with MySQL 5.5, it should have no trouble working with MariaDB 5.5 and shouldn't notice the difference.

In most cases, newer software versions are backward compatible with old applications.  If in doubt, you should check with your application vendor to ensure there are no compatibility issues with CentOS 7 or the newer software it provides.

Should I Choose CentOS 7?

We recommend choosing CentOS 7 for new deployments unless there's a specific reason to avoid it.  Using CentOS 7 has the following advantages:

  • As the newest release of CentOS, it will be supported for the longest period of time. Security and major bug fixes will be provided until 2024.
  • All software that Steadfast supports with CentOS 6 is known to work well with CentOS 7.
  • It includes new features and optimizations that will never be included in previous CentOS releases.
  • It boots faster and runs better on most newer hardware than previous CentOS releases.
  • Applications will soon begin to discontinue support for older releases in order to take advantage of new technology.

CentOS 6 still remains the better choice in the short term in some specific cases:

  • You have applications or scripts that you know are not compatible with systemd, or with one of the new software versions listed in the table above.
  • You have an existing cluster of servers and would like to maintain the same software configurations across the entire environment.
  • You are using very old legacy hardware which CentOS 7 doesn't support.  If this is the case, we encourage you to consider upgrading to a newer server.

In mid-2017, CentOS 6 will stop being revised for new types of hardware, after which it will become increasing likely that some Steadfast products will no longer be compatible.  If you build an environment based on version CentOS 6 now, you may have trouble expanding it in the future without having to mix different versions of CentOS.

Getting Advice

If you aren't sure which version of CentOS to select or you need any other help finding the right solution for your environment, contact us, and we'll be happy to help!

Choosing an Operating System

This article explains some considerations when choosing an operating system for your dedicated server or cloud VM. If you have any questions or need advice, feel free to contact our sales or support teams.

Narrowing Your List

The first thing to consider is what software you intend to run. For example, if you absolutely need to run Windows software, like game servers, .NET applications, desktop applications, you should choose a version of Windows. You should review the system requirements for your software carefully to find out what supported operating systems you can choose from. If you do not have any specific needs for software, we will always recommend using Linux because it offers the greatest flexibility in terms of supported software and ease of later migration.

Selecting a Linux Distribution

Steadfast Networks supports the following Linux distributions:

  • CentOS
  • Debian GNU/Linux

CentOS is our preferred Linux option because it has a very long life cycle and the most available software supporting it. More detail on CentOS can be found here. If you are already familiar with desktop Linux, CentOS is most similar to Fedora in how it is maintained and how files are organized. If you are familiar with Ubuntu, Debian GNU/Linux will be most similar to what you have used before.

If you have no preference, we recommend selecting the latest CentOS release available. If you specifically like the Debian-style system layout, Debian is a suitable alternative, though its support life cycle is shorter and less clearly defined. In many cases, upgrading from version to version is easier to do on Debian systems, so once a Debian release goes out of maintenance, you can use a well-documented in-place upgrade procedure to move to the new release. CentOS can be upgraded in this manner, but the procedure is not as well tested or supported. Please note that, in general, Steadfast recommends clean installations when upgrading Linux to a new major version to reduce the risk of complications. In-place upgrades are not guaranteed or officially supported by Steadfast technical support.

Why Debian instead of Ubuntu?

Steadfast prefers Debian over Ubuntu because of the additional software flexibility and stability it offers. Debian provides one of the largest software repositories of any distribution and operates on the widest variety of platforms, but also operates with one of the smallest footprints in terms of storage and memory. Debian maintains three release branches, marked stable, testing, and unstable. Stable is always the current release, which retains older but very well-tested software versions of packages with bug fixes and security patches as needed. This maintains a highly stable system which can be selectively upgraded using "backports" to access newer versions of commonly requested software if needed. The testing branch of software may also be used selectively at the risk of reducing stability of the system. Debian's support lifecycle is unfortunately somewhat ambiguous, though it has typically been 3 to 4 years. The years between releases are spent extensively testing updates and improvements nominated for the next release. Releases are not delivered until they meet specific criteria, rather than based on a routine timeline, which reduces the chances problems due to rushing. It also provides one of the most robust and reliable upgrade processes from one release to another, which mitigates a lot of the disruptions, even on production systems.

Ubuntu builds on top of Debian releases to produce frequently updated, desktop-tuned releases. We have found that Ubuntu suffers similar issues to Fedora. A new release is provided once every 6 months and only the last two are supported. After support ends, a distribution upgrade is required to continue receiving security and bug fix updates, which can be very disruptive to a production server environment. Debian supports releases for much longer and continues to hold back packages to older versions to reduce the risk of introducing instability and volatility to production environments.

Ubuntu answers this criticism with a secondary release cycle called "Long Term Support." LTS releases are made stable every fourth release of Ubuntu and receive security and bug fix updates for 5 years. This is shorter than the 10 years for Red Hat Enterprise distributions, but longer than a typical Debian release cycle. Unfortunately, our experiences with Ubuntu have indicated that package quality is often lower in Ubuntu than equivalent Debian releases and the installation process is not tuned well for server environments, which makes fast deployment and flexible installation options difficult to offer. Ubuntu has also proven more difficult to support and maintain for our customers, so we have opted to support only Debian.

Why CentOS instead of Red Hat Enterprise Linux or Fedora?

Due to the software license for Red Hat's distribution, they are required to release the source code to its components. CentOS rebuilds these packages, tests them to ensure compatibility with Red Hat's builds, and releases equivalent releases. This means that effectively CentOS is the same software release with a different name and different branding. CentOS does not include a support contract, however Steadfast Networks is intimately familiar with maintaining CentOS systems and certifies the releases on our own hardware. Since we take care of the support for you, the separate support contract isn't needed. For this reason, we don't offer Red Hat Enterprise Linux and offer CentOS as a completely compatible replacement for it. If you need RHEL for compliance of some kind, we can install it if you can provide the media and the license.

Fedora is a community-driven project intended primarily to support desktop users and help to test new software nominated for inclusion in future versions of Red Hat Enterprise Linux. Fedora releases are made once per six months, and only supported for approximately one year. After the year ends, any update to software, including for security reasons, requires you to upgrade your system to a new version of Fedora. These properties make Fedora a cutting-edge Linux distribution, but they also make the platform volatile and unstable. Upgrading the entire distribution, every six to twelve months can be very disruptive to a production server environment, so we have decided not to support Fedora on servers.

A lot of the software from Fedora considered most useful to server environments is available in a free repository called Extra Packages for Enterprise Linux (EPEL) which we can add to your server if needed.

Why not another Linux distribution?

Steadfast made determinations about which Linux distributions to support by identifying those which had the highest demand, widest support for hosting software such as control panels, best hardware support, and longest life cycle. CentOS meets these needs and satisfies most situations which require a distribution laid out like Red Hat Enterprise Linux using software packaged in RPM files. Debian meets these needs and satisfies most situations where a Debian-style system layout and software packaged in DEB format is needed.

Distributions that are very different from Debian or CentOS are rarely requested and often best suited to experienced users with specialized needs. We can attempt to install unsupported Linux distributions on servers at your request, but we can't guarantee that they'll work on our hardware or that we'll be able to fix problems with them that come up. Our modern dedicated server offerings feature remote console access (IPMI), which means you can try to install any operating system you like, if you don't mind dealing with any issues on your own. If in doubt, choosing CentOS or Debian helps ensure you server will be as reliable as possible and that we'll be able to help when something goes wrong.

Selecting a Windows Release

Steadfast supports the following Windows releases:

  • Windows Server 2016
  • Windows Server 2012 R2
  • Windows Server 2008 R2

Steadfast currently recommends Windows Server 2012 R2.  Windows Server does not support 32-bit hardware.

Server 2008 R2 will remain supported until at least 2018 and Server 2012 will remain supported until at least 2023.

For information about Windows Server 2008 R2 editions, see this page. For information about Windows Server 2012 editions, see this page.

Why Windows Server instead of Windows 7 or 8?

Windows 7 and 8 are not considered a server-grade release and are not designed for server hardware or data center licensing. As a result, we discourage their use and do not offer licensing for them. Windows Server 2008 R2 is based on the same core as Windows 7, and Windows Server 2012 is based on the same core as Windows 8. We've found almost everything that can run on 64-bit desktop releases of Windows will run on the equivalent server release.

Colocation Policies

Data Center Access

All colocation customers are allowed to enter our data center space to work on their own systems at any time. All we ask is that you contact us at least 10 minutes in advance so we can be prepared for your arrival. If that is not possible there may be some delays, but you will still be allowed into the space. You must be listed as a contact in the management control panel at https://manage.steadfast.net or we must receive an email from a primary contact granting access to the space, in order for you to be allowed into the data center space. The primary contact and/or Company are responsible for the actions of all people they authorize for access or otherwise allow into our data center facilities.

No one under the age of 18 is allowed in the data center space unless they are specifically granted access by an authorized contact and a minimum $1 million per incident liability insurance policy is in place, listing Steadfast Networks LLC as an insured party.  

No food or drink is allowed in the data center at any time.  

We reserve the right to refuse access to our data center facilities for any reason, such as (but not limited to) excessively disrespectful behavior, dangerous behavior, or violation of these policies.  

Billing Authorization

If someone is on the customer access list or specifically given access to customer space it must be assumed that that individual is a representative agent of the customer and is thus given authorization to submit tickets or make other requests that may result in billing based on the terms of the contract or other standard billing rates as outlined here. If this is not the case, the customer must clearly specify in advance and such terms must be agreed upon by Steadfast in advance.

Standard Rates

Our standard on-site hands rates are:

  • Simple Data Center Hands - For data center tasks requiring primarily manual work, such as racking systems, running cables, or pressing buttons. If you can present clear, simple instructions to our data center technicians to complete this task, requests will be billed at this level. - $160 per hour, billed at the quarter hour
  • Advanced Support - For anything above the level of Simple Datacenter Hands, such as System Administration, Network Engineering, and System Design/Engineering. - $300 per hour, billed at the half hour 

Our standard storage rates in Chicago (there is no storage available in our New Jersey location) are:

  • Small Bin ( 17.7” x 10.1” x 6" ) - $25/mo
  • Large Bin ( 19.8” x 13.8” x 11.8" ) - $50/mo
  • For storage of complete systems or other items that do not fit in the above bins this will need to be negotiated specifically with your account manager in advance. Fees start at $30/mo per item.

Our standard rates for in-cabinet power distribution units (PDU), otherwise known as a power strip, as they are not included in cabinets by default:

  • Metered 20A 120v 0u (vertical) APC PDU with 20 (or more) outlets - $50/mo
  • Metered 30A 208v 0u (vertical) APC PDU with 20 (or more) outlets - $80/mo
  • Other PDUs (May be available, but please contact us in advance) - $100/mo

Note: We attempt to always have these PDUs available, but there is no guarantee of immediate delivery unless purchased in advance.

Organizational Policies

If you do come to the data center there are certain rules you must follow to help maintain a clean and safe working environment.  First, please clean up after yourself. There are trash receptacles inside both of our data center spaces and large garbage carts near the entrances to both data centers where all trash should be thrown out.  We do not allow anything to be stored inside your server cabinets other than the servers and related equipment. This means no paper, boxes, CDs, CD cases, etc. If you do need to store things at the data center, we provide storage bins as indicated above.  

We also provide (on a first come, first served basis) the following items for customer use at no additional charge:

  • power cables (3 foot 120v and 208v)
  • Cat 5e network cable (7 foot, 10 foot or spool)
  • RJ45 ends
  • cable crimpers
  • cable testers
  • label makers
  • cage nuts and screws
  • crash carts (with keyboards, monitors, and mice)
  • screwdrivers, scissors, and other tools

These items may not be removed from the data center.   All customer-use tools and cabling are available inside the data center and must be returned when you are done with them.  If you need assistance locating customer-use items, please contact any available staff member.  If you do not return items and clean up after working in the data center, you may be charged the value of the lost item and for clean-up at our standard hourly rate.

Any equipment must be securely rack-mounted or on a shelf in the location specified by our staff.  You cannot place equipment on the floor of a cabinet or on top of another system as unsecured equipment can be hazardous to our staff.  Everything must stay inside your designated cabinet space and any cables run between adjacent cabinets must be run inside the lower basket rack above the cabinets. It is also recommended that you label every piece of hardware and all network cables and keep up-to-date documentation to assure quick resolution of support requests.  

We do not allow customers to store exposed cardboard, wood, or paper products anywhere in the data center. This is for both fire prevention and cooling reasons. Any cardboard or paper should be either thrown out in the trash receptacles or taken back with you. If you do need to store items that you would like to keep in boxes, you will need to utilize or purchase storage space as specified above. 

All customer cabinets and equipment must maintain front to back airflow. The data center is set up in a strict hot-aisle and cold-aisle configuration and any changes in the airflow patterns can negatively affect other clients. Customers will be informed of improper airflow and we expect prompt resolution of these issues.  If action is not taken, we reserve the right to make the needed adjustments on our own.  Blanking panels are provided at no charge and may be installed proactively to correct any improper airflow.

Support Requests

If you do need us to do work on your colocated equipment, you accept that by making a request, you will be charged our standard on-site labor rate as listed above. There will always be a fee for any work requested and completed.  

We request that directions be as complete and detailed as possible, as we will likely be unfamiliar with the specific hardware and software you are running.  Requesting us to fix a problem without providing details is enough for us to start working on the issue, but it may take much more time to diagnose the problem, resulting in much higher charges.  Work requests can be made by anyone on the access list unless their access is specifically restricted with a statement saying “No Billable Actions Authorized.”  To add or remove someone from the list of primary and/or billing contacts, you can log in to your control panel at https://manage.steadfast.net.  Under Client Profile, click “View Profile” and then add, edit, or delete contacts. To be able to request major changes to the account, such as upgrades, the person must be specifically listed as a Billing Contact or a Primary Contact.

Power Utilization

When allocated a full circuit, it is the customer's responsibility to assure that fire code is followed, which does not allow more than 80% sustained utilization on a given circuit.  If it is noted by our staff that this code is not being followed the customer will be contacted and given 24 hours to resolve the issue. If the issue is not resolved within 24 hours we reserve the right to identify and disable the minimum amount of equipment needed to reduce power utilization to safe levels.  

For shared colocation customers, power utilization is checked on initial boot with all available modules/components running and adjustments may be made to the billing service to adjust for differences in power utilization.

Shipping/Receiving Policies

Any items shipped to us must be shipped via UPS, FedEx, DHL, local courier or freight service or brought in by hand directly to the data center. We do not accept shipments via the US Postal Service. If the item is shipped, you must provide a tracking number to our support department, so we can identify the package as yours. You should also provide us with setup and installation instructions.  

We will not unpack or prepare equipment shipped to us unless it is specifically requested. Shipments must be put into your permanent storage, racked, or utilized within one week of being received, otherwise storage fees may be charged at the listed rates.  It is expected that any equipment sent is already configured or installed. Installations and other related work are billed at our standard rate and detailed instructions must be provided.  

Shipments are often signed for by a third party, such as building security or loading dock agents, so we cannot guarantee package inspection prior to the shipment being accepted.  

We will not keep any boxes, packing materials, cables, or other items in the boxes that are not necessary for racking or mounting the device unless specifically requested and the listed rates are paid for storage.  Please note that we will use our own network and power cables unless otherwise requested, so the original cables will not be kept or returned with systems.

For outbound shipments, you will be charged for minimum of one half hour of on-site labor per item for packing and handling, plus the associated shipping and materials costs. While we do keep a number of server boxes on-site, we cannot guarantee we will have the quantity or type of boxes necessary for all situations and make no guarantees as to the quality or suitability of these materials.  It is highly recommended that you send us boxes and shipping material specific to your system for outbound shipments. You are responsible for maintaining proper insurance through the entire shipping and receiving process.  If proper plans are not made for outbound shipments and local storage of the equipment is necessary for over one week you will be charged the listed storage fees.

It is highly recommended that you include a return shipping label with any shipments sent to us, so we can return the packaging to you.  This will allow you to store the packaging materials yourself and send the box back to us when you want to have the device returned to you.

Correcting Windows Clock Drift under High-CPU Conditions

Certain CPU-intensive applications (trading applications in particular) will cause "clock drift" on Windows systems. Severe enough clock drift will cause Windows to re-sync with the system's hardware clock (also know as RTC, or Real Time Clock). This can cause Windows to change the clock to UTC or GMT in virtualized environments.

"Clock Drift" in this context is defined as the clock going out of sync. This is caused by Windows using SNTP (Simplified Network Time Protocol) rather than a full NTP service; as well as Windows having a too-infrequent clock update cycle by default. There are two ways to alleviate this issue.

Correcting clock drift by installing a third-party NTP service

The most reliable manner to correct this issue is to use a third-party implementation of the NTP service to update the system's clock. We have been succesful at using the Meinberg NTP daemon port for Windows, which includes an easy-to-use installer. You can download it at the following link:

http://www.meinberg.de/english/sw/ntp.htm

Download the installer to your computer, and double-click it to run the installer.
  1. After downloading and running the installer, step through the default for each option, until you reach the "Configuration File Settings" screen. Here, choose the following:
    • Location of configuration file: Leave at default.
    • Create an initial configuration file with the following settings: Leave checked
    • Want to use predefined public NTP servers (see www.pool.ntp.org)? Choose Choose "United States of America"
    • You can specify up to 9 NTP servers (comma separated) you want to use: Leave blank.
    • Use fast initial sync mode (iburst) Leave checked.
    • Add local clock as a last resort reference Leave unchecked.
  2. When prompted to review settings, click "No".
  3. At the "Setting up NTP Service" screen, click "Next >"
  4. At the "Enter the User ID and password used for running the service" screen, enter a secure password for an NTP account, and click "Next >"
  5. Click Finish

This will replace the Windows W32Time service with the Meinberg NTP daemon. You can get up-to-date time statsitics by clicking Start > All Programs > Meinberg > Network Time Protocol > Quick NTP Status.

This will also automatically set the clock to update on a more frequent, and more accurate, basis.

Correcting clock drift by altering the W32Time service parameters in the Windows Registry

This will possibly help, but is not a recommended solution. Microsoft acknowledges that the Windows W32Time service is insufficient for any high-accuracy applications:

"We do not guarantee and we do not support the accuracy of the W32Time service between nodes on a network. The W32Time service is not a full-featured NTP solution that meets time-sensitive application needs. The W32Time service is primarily designed to do the following:

  • Make the Kerberos version 5 authentication protocol work.
  • Provide loose sync time for client computers.

The W32Time service cannot reliably maintain sync time to the range of 1 to 2 seconds. Such tolerances are outside the design specification of the W32Time service."

-- Source: Microsoft Support Article ID 939322: "Support boundary to configure the Windows Time service for high accuracy environments"

If you would like to make adjustments to the Windows Time Service regardless, follow the below steps:

  1. Click "Start", then "Run...", and enter "gpedit.msc"
  2. Navigate through the Local Group Policy Editor tree as follows: Local Computer Policy > Computer Configuration > Administrative Templates > System > Windows Time Service
  3. Double-click on "Global Configuration Settings"
  4. In the Global Configuration Settings window, click "Enabled" to enable the options pane.
  5. Adjust the MinPollInterval and MaxPollInterval parameters to suit your needs. Note that this parameter is defined in log base-2; meaning that it will update according to the following formula: 2 ^ MinPollInterval. By default, this is 6, or 2 ^ 6 = 64 seconds. By default, Windows will update the clock somewhere between 64 and 1024 seconds.
  6. Click Apply, then OK, and close the Local Group Policy Editor window.

If you have any questions, or experience further issues with clock drift on Windows systems, please contact support

DNS Resolver IPs

DNS resolvers are used to look up IP addresses, mail servers, and other information related to a domain name.  Resolvers are required to use the Internet effectively.  This article describes the resolver configuration for servers hosted with Steadfast.  A new dedicated server or cloud VM will automatically be configured to use these settings by default.

We provide the following DNS resolver addresses for all customers on our network:

IPv4:

  • 216.86.146.8
  • 216.86.146.9

IPv6:

  • 2607:f128:1::2
  • 2607:f128:1::3

If your server connects only to our Internal Network and has no public Internet Connection:

  • 10.1.251.10

You can enter the appropriate IP addresses under "Resolver IPs" in your Windows Interface Configuration, in WHM, or by inserting the following lines into /etc/resolv.conf on a Linux or FreeBSD system:

nameserver 216.86.146.8
nameserver 216.86.146.9

The pairs of IPs above are each hosted on physically separate servers.  You should always use at least two separate servers, if possible.  Feel free to use these IPs as backup addresses even if you run your own DNS resolver.

Please note that if you are considering running your own resolver, you should make sure it is not publicly available unless absolutely necessary.  Please see our article about DNS Amplification Attacks for further information.

Enterprise Anti-Spam Filtering
On February 11th, 2011, we deployed a new filtering solution based on SpamExperts, which provides additional redundancy and IPv6 support, as well as much more granular control over filtering and user access. This documentation explains some of the core features and how to use them.

Basic Setup

It's now possible for all customers to add and remove domains without administrator assistance. To do this, go to "Domains" and select "Add domain" then specify the new domain and route you wish to add. Once this is done, you can begin using the filtering system by changing the MX records for your domains as follows:

<domain>. <TTL> IN MX 10 a.spamfilter.steadfast.net.
<domain>. <TTL> IN MX 10 b.spamfilter.steadfast.net.
  • <domain> should be the domain name. Some DNS systems expect the domain to be left blank.
  • <TTL> can be left to your DNS system's default or any value of your preference.
  • The value of 10 is the priority and can be changed at your discretion as well
  • Both records should be left at the same priority.

Per-domain and per-mailbox user creation

It's now possible to create per-domain and per-mailbox user accounts. By selecting "Permissions" under the "Users" heading, it is possible to create restrictions on which features the user accounts may access.

Per-mailbox users are created by selecting "Webinterface users" under the "Users" heading. These users may:

  • Access mailbox-level email logs and quarantine.
  • Configure mailbox-level scheduled protection reports.
  • Report spam that was missed by the filter.
  • Mark the mailbox as whitelisted from filtering.

Per-domain users are created by selecting "Manage domain users" under the "Users" heading. These users may:

  • Manage domain filtering and delivery policies.
  • Manage whitelists and blacklists.
  • Access domain-level email logs and quarantine.
  • Configure domain-level and mailbox-level scheduled protection reports.
  • Report spam that was missed by the filter.
  • Manage per-mailbox "webinterface users"

Quarantine Access and Spam Reporting

There are three ways a user can access his quarantine and report spam:

  • By logging into the web interface.
  • Setting up scheduled protection reports
  • By setting up the IMAP quarantine system.

Any user with a domain or webinterface (per-mailbox) account can access any method.

Using the Web Interface

When logged into the web interface, a domain or webinterface user can use the "Report Spam" or "Spam Quarantine" options to manage the quarantine and report misclassified messages.

Setting up Protection Reports

Domain-wide protection reports can be set up by domain users by selecting "Manage Settings" under the "Protection Report" heading. Per-mailbox protection reports can be set up by either domain or webinterface users by selecting "Manage recipients" under "Protection Report." These reports are emailed to the user on the schedule indicated and individual messages can be released via a link next to each listed message.

Using the IMAP System

To set up the IMAP system, a user may simply add an IMAP account to their favorite email client with the following details:

  • Server: spamfilter01.steadfast.net
  • Username: domain name or webinterface user name (email address)
  • Password: user's password

Three mailboxes will be visible:

  • Caught
  • Release
  • Spam

"Caught" is a browseable folder that shows all quarantined messages. "Release" and "Spam" cannot be browsed. To release any caught messages that is not spam, a user can simply drag the message from "Caught" to "Release" and it will be delivered normally. To mark any uncaught message as spam, simply drag it from a usual mailbox to the "Spam" folder.

Either action will report the message as misclassified so that future messages may be filtered more correctly.

Further Reading

Extensive documentation for the SpamExperts appliance is available via the official Wiki. Please be aware that not all features listed are available on our filtering system. If you have any questions or need assistance, please contact support and we'll be happy to assist you.

High Memory Usage on a server when nothing is running
The common philosophy with respect to system memory is that unused memory is wasted. Most operating systems, including both Windows and Linux maintain what's called a memory "cache." Technically this memory space is in use, however it is designed to be freed immediately if applications actually need the memory.

In the meantime, if a program that is running accesses data from a slow I/O device such as a disk, the data is stored in this cache space so that if it needs to be accessed again in the near future, the operating system can skip reading the disk and just deliver data directly from the cache. Since RAM is much faster than the hard drives, this produces better performance for the program and gives the RAM something to do when it's not needed for other purposes.

If you are using Windows, you can see the amount of memory being used for cache in the Task Manager, on the Performance Tab. The Physical Memory section lists your total installed RAM, as well as how much is "Available" and how much is used for the "System Cache." Both of these numbers, summed together will equal the amount of RAM that can reasonably be used for running programs.

In Linux, running the command "free -m" will show you two rows of data about your RAM. The first shows the information as if your cache and buffer space are used memory. The second row shows the adjusted totals if you consider those values as free.

There is an excellent and reasonably non-technical explanation of how this works on a Linux system at the Gentoo Linux forums.

Installing FFMPEG and FFMPEG-PHP
This article explains how to install FFMPEG and FFMPEG-PHP on your server. It assumes you are running CentOS or Fedora.

Installing FFMPEG and related packages

  1. DAG provides good RPM packages for CentOS and Fedora releases which can be used for this purpose. Visit: http://dag.wieers.com/rpm/FAQ.php#B Follow the directions to install the RPM package for the version of Linux you are running.
  2. Run the following command to install the FFMPEG packages: yum -y install ffmpeg ffmpeg-devel mplayer mencoder flvtool2 libogg libvorbis lame

FFMPEG should now be installed. The programs for mplayer, mencoder, ffmpeg, flv2tool and lame should be located in /usr/bin.

Installing FFMPEG-PHP

This process varies by control panel and requires that you complete the section above first. Please find the correct section for your control panel.

Plesk or InterWorx

  1. Run the following command to make it possible to compile FFMPEG-PHP yum -y install php-devel
  2. Run these commands to compile and install the module: cd /root
    wget http://downloads.sourceforge.net/ffmpeg-php/ffmpeg-php-0.6.0.tbz2
    tar -xjf ffmpeg-php-0.6.0.tbz2
    cd ffmpeg-php-0.6.0
    phpize
    ./configure
    make install
  3. Run the following command to activate the module within PHP: echo 'extension = "ffmpeg.so"' > /etc/php.d/ffmpeg.ini
  4. Restart Apache so that PHP reloads: service httpd restart

cPanel or DirectAdmin

  1. Run these commands to compile and install the module: cd /root
    wget http://downloads.sourceforge.net/ffmpeg-php/ffmpeg-php-0.6.0.tbz2
    tar -xjf ffmpeg-php-0.6.0.tbz2
    cd ffmpeg-php-0.6.0
    phpize
    ./configure
    make install
  2. Run the following commands to activate the module within PHP: EDIR=`php-config --extension-dir`
    sed -i "s%^extension_dir%extension_dir = \"$EDIR\"\nextension = \"ffmpeg.so\"\n#\0%" /usr/local/lib/php.ini
  3. Restart Apache so that PHP reloads: service httpd restart

Your installation should be complete. You should now be able to use FFMPEG-PHP via your PHP scripts.

Please note that if you ever upgrade PHP to a newer version in which the major and minor numbers change, you must repeat this step. For example, if you were using PHP 4.4.7 and you upgrade to 4.4.8 you do not need to do anything, but if you upgrade from 4.4.7 to 4.5.0 or to 5.0.0, you would need to reinstall the PHP module.

Internal Network VPN Access

This document describes how to connect to the Steadfast Networks VPN server for accessing the Internal Network and IPMI remote server management.

Requesting Access

Access to the VPN is freely available to all customers with a service that is provides IPMI or Internal Network access.  To request access, your name must be listed as an authorized contact in our management portal, or the request for your access must come from someone in that list.

Each computer and person that will connect to the VPN should have its own set of credentials.

Access requests should include the following information:

  • Client ID
  • Authorized User or Device Name
  • Authorized User's Email Address

An email address and client ID are required.  You must also provide either a user or device name to identify the credentials.

Please send the request via email or our helpdesk to the Tech Support department from a person on the authorized contact list for your account in our management portal.  Once the request is received, it will be reviewed within 1 business day, and the credentials will be made available to you if approved.

Revoking Access

In case VPN credentials are compromised or you need to revoke access from a person who is no longer authorized, please contact our Tech Support department via email or our helpdesk.  Please indicate if the situation is an emergency and our team will escalate the request to be handled as quickly as possible.

If you terminate your services with Steadfast, all VPN credentials will be revoked as part of the account closure process.  We also may revoke VPN credentials of any user found to be abusing the service, or if we suspect a compromise.  We will make every attempt to notify affected users if we revoke credentials proactively.

About the VPN Service

The VPN server is running software provided by the OpenVPN project. More information about this project is available at: http://openvpn.net/

The VPN provides access to servers and services that are accessible on the Internal Network and to IPMI services for Dedicated Servers.  It is supported on Windows 7 and later, Mac OS X 10.7 and later, Linux, and mobile devices running iOS 9.0 or Android 4.1 and later.

Please note that though the Internal Network and IPMI are both accessible using the same VPN service, it is not possible to communicate between IPMI devices and the Internal Network directly.  The VPN has the ability to reach both networks, but the networks are not otherwise connected together.

Internal Network

The Internal Network is a service included with Dedicated Servers and Cloud accounts, and available to Colocation accounts upon request.  This is a separate network that links servers and services within Steadfast to one another, but is not accessible from the Internet.  You can communicate with your servers' Internal Network IP addresses and transfer data for no additional charge.  Please note that bandwidth on the VPN is limited and performance will be lower than it would be when accessing your server over the Internet directly.

IPMI

IPMI is a service provided with all Steadfast dedicated servers.  It allows you to remotely access your server's keyboard, video, mouse (KVM), and power controls.  It works with most modern web browsers running on Windows, Mac OS X, and Linux.  Remote KVM requires Java to be installed on your computer.

Your server's IPMI address can be found in the management portal Devices list or your server's welcome email.  It can be accessed only when your are connected to the VPN.

Connecting to the VPN

Your VPN credentials will be delivered in a ZIP file.  The software required to use them is not included.  It must be downloaded separately as indicated in the following sections.  Please locate the section for your computer or device and follow those instructions.  If you need assistance, please feel free to contact us for help.

Windows

Windows devices need to use the OpenVPN community client. Make sure you are running Windows 7 or later. If your computer is running Windows Vista or XP, you should not use the computer to access the Internet.

  • Go to the following link to download the software: https://openvpn.net/community-downloads/
  • Click the button that says "See Details" next to the top version in the list.
  • Click the button next to the "Windows Installer" entry in the list which starts with the name "openvpn-install."
  • Run the downloaded installer program to install the VPN client, selecting all the default options.
  • Once the VPN client is installed, copy the "steadfast.ovpn" file from the ZIP file into c:\Users\<Your Username>\OpenVPN\config. Create this folder if it doesn't exist.

The VPN client will start automatically when you start up or log into your computer. The icon will appear in the system notification area (tray) when it is running: OpenVPN Tray Icon

To connect to the VPN, right click the icon and click "Connect." The first time you connect, you may be prompted to allow OpenVPN to modify the firewall and add your user account to the OpenVPN Administrators group. Allow both of these actions or the VPN will not work properly.

While connecting, a popup window will appear with information about the connection attempt. It will disappear when the connection is finished. The icon will change to indicate the connection is active with a closed lock and green screen: OpenVPN Tray Icon Connected

Mac OS X (Tunnelblick)

MacOS X devices should use the Tunnelblick OpenVPN software.

  • Go to the following link to download the software: https://tunnelblick.net/downloads.html
  • Click on the "Stable" download and install it on your computer.
  • Once installed, start Tunnelblick
  • To install the VPN configuration, drag the "steadfast.ovpn" file from the ZIP file to the Tunnelblick icon on the menubar: Tunnelblick Menu Bar Icon
  • Make sure you choose OpenVPN version 2.4.0 or later to avoid various known issues with VPN connections

To connect to the VPN, click the Tunnelblick icon on the menu bar and select the "Connect" option that matches your VPN profile. Once you have connected the icon will change from gray to black: Tunnelblick Menu Bar Connected Icon

Android Devices (4.1 or later)

Android 4.1 and later devices should use the OpenVPN Connect app from Play Store.

  • Go to the following link to install the app from your Android device or a computer logged into the same Google account as your phone: https://play.google.com/store/apps/details?id=net.openvpn.openvpn
  • Open the ZIP file and copy the "steadfast.ovpn" file to your computer
  • Copy the "steadfast.ovpn" file to your device via your preferred transfer method
  • Once the app is installed and the "steadfast.ovpn" is on your device, open the OpenVPN Connect app
  • Tap the green plus button in the lower right corner
    OpenVPN Connect Import Button
  • Browse to the location on your phone where you saved the VPN configuration file
  • Tap the "steadfast.ovpn" file in the list so it has a check mark to its right, then tap "IMPORT" in the upper right corner
    OpenVPN Connect Import Browse
  • Enter a name for the profile or accept the default and tap "ADD" in the upper right corner
    OpenVPN Connect Import Title

To connect to the VPN, open the OpenVPN Connect app and tap the toggle switch for the VPN profile:

OpenVPN Connect Profile Disconnected

Once you have connected, the status indicator will show "CONNECTED" and the toggle switch will move to the right:

OpenVPN Connect Status Connected

iOS Devices (9.0 or later)

Apple iOS 9.0 or later devices, including iPhones, iPads, and iPods should use the OpenVPN Connect app from the App Store.

  • Go to the following link to install the app from your iOS device or a computer logged into your Apple account: https://itunes.apple.com/us/app/openvpn-connect/id590379981
  • Open the ZIP file and copy the "steadfast.ovpn" file to your computer
  • Using iTunes, select the File Sharing feature, click on "OpenVPN" and add the "steadfast.ovpn" file under "OpenVPN Documents"
  • Once the "steadfast.ovpn" file is on your device, open the OpenVPN app
  • You should see a message that there is 1 new OpenVPN profile available for import; tap the "ADD" button.
    OpenVPN Connect iOS Import
  • Enter a name for the profile or accept the default and tap "ADD" in the upper right corner
    OpenVPN Connect iOS title screen
  • You will see a notice that "OpenVPN" would like to add VPN Configurations; tap "Allow"
    OpenVPN Connect iOS Permission

To connect to the VPN, open the OpenVPN Connect app and tap the toggle switch for the VPN profile:

OpenVPN Connect iOS Status Disconnected

Once you have connected, the status indicator will show "CONNECTED" and the toggle switch will move to the right:

OpenVPN Connect iOS Status Connected

Linux

On some GNU/Linux distributions, NetworkManager-openvpn provides an easy method to configure and run OpenVPN from within GNOME. Otherwise, try running the following command as root:

openvpn --config steadfast.ovpn

The openvpn package is standard on all Linux distributions, but you will need version 2.4.0 or later for full compatibility with our VPN service.

If using NetworkManager, you will need to use the individual certificate and key files contained in the ZIP file for connecting as NetworkManager does not yet support the "ovpn" configuration file format.

Contents of The ZIP File

  • steadfast.ovpn - This is the primary OpenVPN configuration file. It includes the content of the files below. The other files are provided in case the application you are using does not support reading the certificate information directly from this configuration file.
  • steadfastca.crt - This is a public certificate file used to verify the VPN and your personal certificate. It is used for the "ca" configuration option with OpenVPN.
  • client1.crt - This is your personal public certificate file. It is used for the "cert" configuration option with OpenVPN.
  • client1.key - This is your personal private key file. Authentication with the VPN is accomplished using this file. It is important that you keep this file secret. The file is used for the "key" configuration option with OpenVPN.

Testing the Connection

Once connected, you should be able to run:

ping 10.2.255.10

To run ping from Windows, run a Command Prompt (normally found under Accessories) or run cmd.exe  Then select the resulting black box and type"ping 10.2.255.10" and press enter.

To run ping from Mac OS X, go to Applications, then Utilities and then select Terminal.  Select the resulting terminal window and type"ping 10.2.255.10" and press enter.

If the ping is successful, you should see lines that begin with something similar to "64 bytes from 10.2.255.10" that are produced about once per second.

IP Allocation Justification

Colocation and dedicated server accounts come with 1 IPv4 address by default. Additional IPs may be requested by emailing ips@steadfast.net at no charge under the following conditions:


Initial Free Allocations
ServiceIPv4IPv6
Dedicated Server /29 - 8 IPs /56 to Account; /64 to Server
Single Server Colocation /29 - 8 IPs /56 to Account; /64 to Server
Half Cabinet (21U) /26 - 64 IPs /48
Full Cabinet (42U) /25 - 128 IPs /48

Larger allocations are available for additional fees.

  • IPv4 /29 (8 IPs) - $10 per month
  • IPv4 /28 (16 IPs) - $20 per month
  • IPv4 /27 (32 IPs) - $40 per month
  • IPv4 /26 (64 IPs) - $80 per month
  • IPv4 /25 (128 IPs) - $150 per month
  • IPv4 /24 (256 IPs) - $250 per month

All IP requests must be reviewed and processed by a network engineer.  This means that these allocations are processed during a limited window of 9 AM to 7 PM, Monday through Friday. Most requests submitted over the weekend will not be handled until 9 AM on Monday morning.  We cannot generally escalate requests to be processed over the weekend and cannot guarantee a response time on such requests.

Colocation IP fees may vary depending on service, so please request a quote (sales@steadfast.net) for more details.  We reserve the right to charge additionally for IP space based on the risk factors involved in the justification provided.

All IP address requests must meet justification requirements which may be subject to validation and verification. Initial allocation requests must include the types of service that specifically require separate IP addresses. Subsequent allocations may re-use the existing justification, but documentation may be requested to demonstrate that 80% of the previous allocated address space has been efficiently used. IPv4 and IPv6 allocations are considered separately and both may be requested using this form.

Customer ID...................: 
Request subnet sizes..........: 
Existing assignments..........: 
                              : 

IPs utilized/projected for          immediate     3mo     6mo     1yr
    routers/switches..........:             _       _       _       _
    other infrastructure......:             _       _       _       _
    servers...................:             _       _       _       _
  * IP-based virtual hosting..:             _       _       _       _
    SSL virtual hosting.......:             _       _       _       _
  * virtualization............:             _       _       _       _
    subnetting overhead.......:             _       _       _       _
  * other (specify)...........:             _       _       _       _

* Reason for using IP-based virtual hosting:

* Virtualization technology being deployed:

* Other (specify) address utilization:

Additional remarks:

IPv6 Deployment and Planning Information
This article provides details about IPv6 and the reasons it is important to deploy it, as well as various considerations and caveats when using IPv6 on production server environments.

What is IPv6?

IPv6 (Internet Protocol version 6) is a replacement for IPv4 (Internet Protocol version 4). IPv4 is the widely deployed protocol that provides your computer with a familiar 4-segment dotted IP address and allows you to reach everything on the Internet. Due to the limited amount of address space IPv4 provides, IPv6 was standardized in 1998 to provide a much larger address pool and to deal with other limitations and faults of IPv4. IPv4 addresses are 32 bits in length, which provides 2^32 (about 4.3 billion) possible addresses. IPv6 addresses are 128 bits in length, which means 2^128 (about 340 undecillion) possible addresses, or the entire size of the IPv4 address pool to the fourth power. While the standard has existed for over a decade, the prospect of running out of IPv4 space seemed to be far into the future, so very little had been done to adopt IPv6 until recently. Since IPv6 is not compatible with IPv4, all network-capable software and hardware needs to be re-engineered in order to make use of IPv6.

Now, as the IPv4 pool is almost completely depleted, some providers, engineers and developers are beginning to realize the urgency of making a change to support IPv6 and adoption is beginning to pick up. IPv4 will need to continue to exist while IPv6 is being adopted, but eventually when it becomes impossible to obtain IPv4 addresses any longer, some content may be available via only IPv6 and getting started on IPv6 before that day comes is the best way to avoid becoming cut off and needing to scramble to adjust. All Steadfast Networks customers are eligible for IPv6 connectivity for no additional charge as part of all standard service offerings.

Anatomy of an IPv6 Address

An IPv6 address is 128 bits, which means that representing it in 8-bit segments as an IPv4 address is would result in unwieldy numbers. To allow for shorter addresses that are easier to read and remember, the numbers are instead represented in hexadecimal, with eight 16-bit segments separated by colons, and there are rules that allow collapsing an address down to essential information by removing implied zeros. For example, here's a full-length IPv6 address:

2607:f128:0123:4567:0000:0000:0809:abcd

There are several places we can reduce this address. First, we can collapse consecutive segments that are entirely zeros into "::" This can only be done one time in the address because if "::" appeared more than once, it would not be possible to tell how many segments were removed from each instance. With one instance, you can count the number of segments on the left and right of "::" to know how many missing segments it represents. For this rule, the above address becomes:

2607:f128:0123:4567::0809:abcd

We can also remove the leading zeros in any segment, because they can be assumed. We can't remove other zeros because we wouldn't be able to tell where they belong. The result is:

2607:f128:123:4567::809:abcd

IPv6 Subnets: CIDR ("slash notation")

Many people still refer to IPv4 addresses using the "class system" in which a class C is a block of 256 IP addresses. This system was deprecated in 1993 and replaced with the CIDR (Classless Inter-Domain Routing) system, because it more concisely represents all possible subnet sizes. IPv6 uses CIDR as well. CIDR is notated by a slash "/" after an IP address, followed by a number. It represents the "prefix length" or number of invariable bits in the address allocation for the given subnet. A class C in IPv4 is now known as a /24 (32 bits minus the 24-bit prefix length is 8 variable bits; 2^8 = 256). The standard allocation for an IPv6 subnet is a /64. Since an IPv6 address is 128 bits, and the prefix is 64 bits long, the number of remaining bits used for the network address (128 bits minus the 64-bit prefix length) is 64, and thus 2^64 addresses exist in the subnet.

Using IPv6

IPv6 resources cannot be directly accessed using IPv4 resources, nor vice versa. In order to access both, you need addresses and connections to a network with both protocols enabled. The preferred method, known as "dual stacking," is an implementation in which a system has both a public IPv4 and IPv6 address and connects through a provider that makes both protocols available from the system all the way to the Internet. Alternative methods include use of tunnels, which permit you to request IPv6 content by routing your request through a special server that has access to both protocols. The server converts the requests for you, then relays the responses back to you. This is not an optimal solution because it adds the delay and overhead of relaying all of your communications through a third party, but it permits IPv6 access when IPv4 is the only option at your end. Tunnels that allow IPv6 users to reach IPv4 exist as well and will become more popular when it becomes difficult to obtain IPv4 addresses in the future.

Steadfast Networks provides customers with native, dual stacked networking. This means you are able to access IPv6 and IPv4 content from your server without any special routing, as long as your server has both protocols enabled. This also means that, with some work, you can serve content to both IPv6 and IPv4 end-users. The subsequent sections of this article will explain some basic principles for accessing and serving IPv6 content.

If your home ISP does not yet support IPv6, which is still most likely, you can use a tunnel like those described above to access IPv6 content to try out some of these concepts. If you have an Apple home networking device, it may have come pre-configured with an IPv6 tunnel system to allow you to do this already.

Enabling IPv6 on your server

If you have a colocation account or custom VLAN configuration, you need to contact our IP allocations department to request an allocation. This is available at no charge. If you have a dedicated server with a standard network configuration, IPv6 connectivity is available already and there are two steps to the process:

  1. Visit our IPv6 address page and input your server ID number in the form. You will be issued an IPv6 address that will work with your server, assuming it has a standard network configuration.
  2. To activate the IP information from that page, visit "Adding IPv6 Addresses to Dedicated Servers".

This process gives you a single IPv6 address useful for allowing your server to reach IPv6 content, but we discourage using this address for serving content because it is not "yours" and does not stay with your account if you change servers or service types. If for any reason you need help configuring your server for IPv6 connectivity, you can contact our IP allocation or support departments and we can help you get basic IPv6 access working.

Hosting via IPv6

As we've noted in the previous section, you should not use your primary IPv6 address for hosting. This means that the first step in setting up your server to host content available via IPv6 is to get a secondary allocation for your server. This allocation will give you 2^64 addresses you can use however you like and the allocation is yours as long as you are a customer, so it can be moved around to other servers or service offerings later at any time. To obtain your secondary allocation, please open a ticket with our IP allocations department and let us know you want to start hosting content over IPv6.

Hosting via IPv6 requires support in the underlying hosting software. At this time, Apache, LiteSpeed and IIS web servers do support IPv6, as does the BIND DNS server. However, without patches and adjustments from vendors and software developers, supporting software such as your email server may not be able to provide IPv6 functionality. Additionally, many domain registrars do not yet allow registration of name servers that run on IPv6 addresses. Due to the fact that the DNS system uses multiple tiers of caching and end users rarely directly contact your server for information, this limitation can be worked around easily at the ISP level and most likely will not be a problem for many years.

If you're ready to begin serving web content to IPv6 clients right now, the following control panel versions can provide you with IPv6 management:

  • Parallels Plesk Panel 10.2 or later (Press Release)
  • DirectAdmin 1.37.1 or later (IPv6 How-To)
  • InterWorx Beta 4.11.0 or later (Release Announcement)

cPanel has promised complete IPv6 support for version 11.36. Until then, setting up sites to work via IPv6 in cPanel requires manual modification of configuration files.

Our support staff can assist you in making small system configuration changes to activate your web and DNS servers on IPv6 addresses to let IPv6 clients see your content over the IPv6 protocol, even if your control panel does not support it. However, to avoid problems as IPv6 support is implemented in the future, we recommend avoiding this approach right now. There is not much harm in giving software a bit more time to catch up and implement IPv6. Our staff will of course remain available down to the wire to help bring sites online via IPv6 if the vendors don't make it by the time your users expect it. We'll also keep watching the implementation of IPv6 on your behalf across the Internet and revise our recommendations if things change to ensure you're prepared.

Making a site point to an IPv6 address

The Domain Name System (DNS) helps a computer find out what IP address to go to when attempting to access content for a domain. The IPv4 address is stored in a record called an "A" record. This provides a direct mapping from something like "steadfast.net" to our IPv4 address 67.202.100.2. For IPv6, a new record type called an "AAAA" record was created in order to allow IPv6 users to find IPv6 addresses instead. The name is a play on the fact that an IPv6 address is four times the length of an IPv4 address. You can publish both an "A" and"AAAA" for a domain name and systems with IPv6 connectivity will automatically check first for an IPv6 AAAA record and try to connect, then fall back to an IPv4 A record if IPv4 connectivity is available, but IPv6 is not. Please note that publishing an AAAA record before ensuring the web server and other services are functioning on the IPv6 address will either cause an IPv6-enabled user to have to wait for the IPv6 attempt to fail or may be unable to access the content at all. Publishing an AAAA record is the last step once all other software is ready to serve content via IPv6.

References and Help

There are a number of useful resources that explain more about what IPv6 is and how it works. From Wikipedia:

  • http://en.wikipedia.org/wiki/IPv6
  • http://en.wikipedia.org/wiki/CIDR
  • http://en.wikipedia.org/wiki/AAAA_record#IPv6_in_the_Domain_Name_System

As always, our support staff will be happy to help you get started with IPv6 and answer any questions you have!

My server's clock and time zone did not update on March 11th, 200...
Due to recent changes in Daylight Savings Time laws in the United States, your server may require an update in order properly handle changing over to Daylight Savings Time. Please see the following tips for proper time zone updates for various server operating systems.

CentOS 3 and 4, Fedora Core 5 and 6

If you are running CentOS 3 or 4, or Fedora Core 5 or 6, you can run the following commands to fix your clock if it did not automatically update for the time change:

yum -y install tzdata system-config-date redhat-config-date
setup

Select "Timezone Configuration" and press Enter. Then, tab to the OK button and press Enter to reset the time zone. Finally, tab to the Quit button and press Enter. Run the following command to confirm the time zone is correct:

date

Your time zone should now show as CDT (for US Central Time) or whatever the appropriate time zone abbreviation is for your server's time zone. If the time zone is shown correctly but the clock is still wrong, run the following command (this will not work for a VPS):

rdate -s time-a.nist.gov

Fedora Core 1 - 4, Red Hat 9, Fedora Core 2 VPS Servers

If your server is running an older Fedora or Red Hat release, software updates are no longer being provided. The following directions will allow you to update your time zone data and correct your clock using files from newer Linux distributions.

For Fedora Core 2 - 4 (including Fedora Core 2 VPS servers), use these commands:

yum -y install rhpl htmlview
rpm -Uhv http://mirror.steadfast.net/fedora/core/updates/6/i386/tzdata-2007c-1.fc6.noarch.rpm http://mirror.steadfast.net/centos/4/os/i386/CentOS/RPMS/system-config-date-1.7.15-0.RHEL4.3.noarch.rpm
system-config-date

If you have Fedora Core 1 or Red Hat 9, you'll need these commands instead:

up2date rhpl htmlview
rpm -Uhv http://mirror.steadfast.net/fedora/core/updates/6/i386/tzdata-2007c-1.fc6.noarch.rpm http://mirror.steadfast.net/centos/3/os/i386/RedHPMS/redhat-config-date-1.5.22-3.noarch.rpm
redhat-config-date

Tab to the OK button and press Enter to reset the time zone. Run the following command to confirm the time zone is correct:

date

Your time zone should now show as CDT (for US Central Time) or whatever the appropriate time zone abbreviation is for your server's time zone. If the time zone is shown correctly but the clock is still wrong, run the following command (this will not work for a VPS):

rdate -s time-a.nist.gov

Debian and Ubuntu

You can run the following commands to fix your clock if it did not automatically update for the time change:

Note: If you are using Ubuntu, please remember to prefix each command with "sudo" and enter your "admin" user's password if prompted.

apt-get update tzdata
tzconfig

Follow these steps to complete the configuration with tzconfig:

  1. You will see your current time zone and be asked if you want to change it. Type "y" and press enter.
  2. At the next prompt, select the region. For standard US time zones, enter the number for "US time zones" or select a region that is more appropriate and enter that number, then press enter.
  3. You will now be given a list of possible zone names. Find one that matches the zone name or nearest city sharing the same time zone as you want to use. Make sure to enter the name exactly as it is shown, including any uppercase letters and underscores, then press enter.
  4. You will be shown the system time in the new time zone, as well as the time in UTC. Verify these are correct.

If the time zone is shown correctly but the clock is still wrong, run the following command:

rdate -s time-a.nist.gov

Windows Server 2003 and other Windows Platforms

If you are running Windows Server software on your system, please see the following Microsoft support page for assistance in ensuring your Microsoft products are capable of handling the transition properly:

http://support.microsoft.com/gp/cp_dst

Windows Server 2003 users can obtain the system clock update via Windows Update or by downloading the following updater:

http://www.microsoft.com/downloads/details.aspx?FamilyID=554a94fe-a478-47a7-b004-0277a292e90e&DisplayLang=en

Further Assistance

If you have any questions or need assistance, please feel free to submit a support ticket.

NTP Time Servers

This article is written to explain our current Network Time Protocol (NTP) offering. Having a consistent time setting across servers help when correlating logged event across servers and is used by security protocols such as SSL, TLS and Kerberos to avoid replay attacks. Since Kerberbos is a key component in Microsoft Active Directory, systems using AD will also benefit from having a good time synchronization source.

NTP Resources

Resources on what NTP is and how it works may be found here:

  • http://en.wikipedia.org/wiki/Network_Time_Protocol
  • http://tools.ietf.org/html/rfc5905
  • http://ntp.org/

It should also be noted that NTP can be used as part of a Precision Time Protocol (PTP) configuration:

  • http://en.wikipedia.org/wiki/Precision_Time_Protocol

NTP Stratum Levels

The Wikipedia article on NTP (listed above) does a good job on going over NTP stratum levels. The United States provides authoritative sources for specifying the exact time. These include radio and phone access to an atomic clock at the US Naval Observatory in Colorado and the Global Positioning System (GPS) satellites. These time sources are referred to as Stratum 0. Time servers that get time directly from one of these sources are called Stratum 1. Then, servers that get their time from Stratum 1 servers are called stratum 2 and so on. The lower the stratum level the higher the quality is considered to be since a lower stratum level should have a more accurate time.

Steadfast NTP Infrastructure

Stratum 1

Steadfast has a stratum 1 time source which get its time via GPS. The antenna for the server is on the roof of our data center facility which lprovides a good view of the sky to hold a lock on several (at least 4) of the North American GPS satellites. The actual number and which satellites are locked changes through-out the day as the positions change (the current positions can be found at http://www.nstb.tc.faa.gov/RT_WaasSatelliteStatus.htm).

The stratum 1 time source is currently only available to Steadfast customers with the following guidelines:

  • They must have a connection directly on the Steadfast public network
  • Cloud customers should not use the stratum 1 (the clock is already kept in sync at the hypervisor)
    • However, Windows cloud customers can still use the stratum 2 servers
  • Any system configured to use the stratum 1 should also be configured to use one of the Steadfast stratum 2 NTP pools such as:
    • time.steadfast.net
    • chi.time.steadfast.net
    • nyc.time.steadfast.net
  • The client should not query the stratum 1 server more often than once per minute unless approved by Steadfast support

The stratum 1 server is a highly accurate FSMLabs TimeKeeper Grandmaster Network Time Server which provides NTP version 4 service over IPv4. Not only does this regularly get accurate time updates from multiple GPS satellites, but in any case it loses GPS lock the unit also includes a Temperature Compensated Crystal Oscillator (TCXO) which helps minimize any clock drift (under 25µs/24hr holdover) until the GPS lock is once again established.

The host name for the stratum 1 server is: gps.time.steadfast.net

Stratum 2

Steadfast has six stratum 2 servers which get their time from both the Steadfast stratum 1 along with other public stratum 1 and stratum 2 servers. These servers should provide an accurate enough time source for the majority of systems.

The individual host names for the servers are:

  • a.time.steadfast.net
  • b.time.steadfast.net
  • c.time.steadfast.net
  • d.time.steadfast.net
  • e.time.steadfast.net
  • f.time.steadfast.net

All six servers are included in in the time.steadfast.net DNS record. The first four servers are included in chi.time.steadfast.net and the last two servers are included in the nyc.time.steadfast.net record.

Unlike the stratum 1 server, the stratum 2 server is available publicly, even to non-customers. Each of the stratum 2 NTP servers are listed in the public stratum 2 server list at: http://support.ntp.org/bin/view/Servers/StratumTwoTimeServers

Configuring Operating System to use NTP servers

CentOS

To use the stratum 2 servers on CentOS, modify the /etc/ntp.conf file and add the following line:

server time.steadfast.net

If you require stratum 1 as well, then also add the line:

server gps.time.steadfast.net

Windows

Microsoft Windows has a built-in NTP client. You can configure it by doing the following:

  • Right clicking on the clock in the lower right corner
  • Select "Adjust date/time"
  • Select "Internet Time" tab
  • Click the button "Change settings..."
  • Make sure the check box is checked for "Synchronize with an Internet time server"
  • Set the Server: text box to: time.steadfast.net (or gps.time.steadfast.net to use only our stratum 1 time server)
  • Click the button "Update now" to test it


This can also be done from a Command Prompt (cmd.exe) window by running the following:

w32tm /config /manualpeerlist:time.steadfast.net /reliable:yes /update

The status can be confirmed by running:

w32tm /query /status

If a non-cloud Windows system requires stratum 1 service, run the following:

w32tm /config /manualpeerlist:"time.steadfast.net gps.time.steadfast.net" /reliable:yes /update

The status can then be confirm using the same command above.


Precision Time Protocol (PTP)

Precision Time Protocol (PTP)

There are a number of computer applications that benefit from having highly accurate time. There are three protocols in popular use to address this need: Precision Time Protocol (PTP) version 1, PTP version 2, and Network Time Protocol (NTP). This article explains Steadfast’s PTP offerings. More information on our NTP offering is provided in this article.

At the heart of our time synchronization offering is a PTP Grandmaster and NTP Stratum 1 server. This system is designed and maintained by FSMLabs, which has 15 years of experience in high performance and critical response time applications. The system leverages the cluster of atomic clocks transmitting from the Global Positioning System (GPS) to maintain accurate clock information. For any brief periods where the GPS signal lock is lost, the system leverages a number of NTP stratum 1 and 2 servers from both inside our network and from the internet.

Steadfast’s offering involves adding our PTP server directly on the customer’s VLAN, which eliminates the overhead of network routing. The PTP server then provides frequent, low latency updates from its clock. Due to limitations inherent in the timing accuracy on virtual machines, PTP services are only available to colocation and dedicated server customers. Any cloud customers that have time sensitive applications are recommended to upgrade to a dedicated server.

It is important to note that PTP v1 and PTP v2 are very different protocols. Devices and software configured to use PTP v1 will not understand PTP v2, and vice versa. We recommend selecting PTP v2 if it is supported by your devices and software.

To make arrangements to get PTP services from Steadfast (starting at $100/mo), please contact your account manager or sales@steadfast.net; be sure to indicate if you need PTP v1 or PTP v2 service. If you are already assigned your own customer VLAN and have any unused IP addresses assigned to you, please specify which local IP address should be assigned to our PTP server.

Please note: Steadfast strongly recommends disabling any PTP-aware features on switches. These features may cause more harm than good, resulting in problems that are difficult to debug. To get the best sync, we recommend turning these features off.

For customers that do not need the frequent updates provided by PTP, we provide NTP stratum 1 and 2 servers. More information about these are available in this article.


Preventing DNS Amplification Attacks

In March 2013, the Open DNS Resolver Project identified many IP addresses on our network that were of moderate to severe risk of participating in a DNS amplification attack.  This attack queries name servers for large results using a fake source address.  This request causes the response to go back to the faked address, resulting in a large amount of data being sent to a computer that did not request it.  This effect, when used with thousands of DNS servers, directs a very large amount of traffic to a single IP to form an efficient distributed attack.  The anti-spam organization Spamhaus was recently the victim of an attack that may have been as large as 300 Gbps using this technique.

This attack can be performed easily using a server you control without compromising its security, and could result in heavy outbound bandwidth usage.  This may impact performance of your services and cause unexpected bandwidth overage bills.

The most common environment we have found with a problem is a CentOS 5.x server running BIND with default settings.  The default BIND version for CentOS 5.x causes a moderate risk.  A severe risk occurs if any DNS server is configured to act as a public DNS resolver.  A public resolver is a server that allows anyone to query it for the DNS records of a domain it does not directly host.

You can confirm your server is affected by querying the server from a Linux or Mac command line on a separate computer:

dig steadfast.net @<server ip>

A version of the "dig" command for Windows can be downloaded from here.

If the resulting status is NOERROR, your server allows queries that it should not.  If the information contains AUTHORITY results but does not containANSWER results, it is a moderate risk.  If it contains any ANSWER results, then the risk is severe.  Other statuses, such as REFUSED, NXDOMAIN, SERVFAIL, or a timeout error message, do not indicate an issue.

To mitigate a moderate risk, the best option is to install the CentOS 5.x bind97 package.  In a cPanel/WHM environment, upgrading to bind97 can be accomplished with the following commands:

cp -Rf /var/named/ /var/named.bak
/scripts/update_local_rpm_versions --edit target_settings.named uninstalled
/scripts/update_local_rpm_versions --edit target_settings.bind uninstalled
yum -y remove bind bind-utils bind-devel bind-libs caching-nameserver
yum -y install bind97 bind97-libs bind97-utils bind97-devel
/usr/local/cpanel/scripts/rebuilddnsconfig

In a non-cPanel environment, you can perform similar steps, but you will likely need to rebuild the /etc/named.conf file from the /etc/named.conf.rpmsave.

Another option that can be used to mitigate the moderate risk level is to upgrade your server from CentOS 5.x to CentOS 6.x.  This upgrade enables you to access other new and improved software and may improve server performance.  However, doing this usually requires reinstalling your operating system and restoring data from backups.

To mitigate a severe risk, you must reconfigure your name server manually.  Recursive resolver behavior is not the default, which means that a configuration change was made to enable recursion on your server.

For advice on how to adjust a server to prevent public recursion or limit the IP ranges that can use recursion, or any other questions about the topics discussed in this article, please visit our Help Desk or email us.  BIND consulting is covered under managed services.

Preventing LDAP Amplification Attacks

In 2018 we saw a significant increase in reports of amplification attacks that take advantage of the LDAP protocol over UDP (CLDAP).  This attack queries LDAP servers for large results using a fake source address. This request causes the response to go back to the faked address, resulting in a large amount of data being sent to a computer that did not request it. This effect, when used with thousands of LDAP servers, directs a very large amount of traffic to a single IP to form an efficient distributed attack.

Most LDAP servers and clients use the TCP protocol, which prevents amplification because of a connection handshake that verifies the source and destination can communicate with one another.  UDP does not perform this verification, so the LDAP server can be convinced to send traffic to a destination that is unverified.

The easiest way to solve this issue is to enable a firewall on your server that blocks the LDAP port 389 from being accessed via UDP.  LDAP is most commonly used on Windows servers running Active Directory services.  If you have a program that is using LDAP via UDP from another server, you should add a firewall exception to allow that application to continue to work, or change that application to use LDAP over TCP.  LDAP may also be running with encryption (LDAPS) on port 636, but this protocol only supports TCP.

To disable access to LDAP over UDP if you do not have any servers that access it, follow these steps:

  1. Right click on Start, then click Run and type "wf.msc" click "OK"
  2. Click on the "Inbound Rules" option on the left side of the window.
  3. Locate the rule called "Active Directory Domain Controller - LDAP (UDP-In)"
  4. Right click on the rule and select "Disable Rule"

If you need to allow access to LDAP from other servers, follow these steps:

  1. Right click on Start, then click Run and type "wf.msc" click "OK"
  2. Click on the "Inbound Rules" option on the left side of the window.
  3. Locate the rule called "Active Directory Domain Controller - LDAP (UDP-In)"
  4. Right click on the rule and select "Properties"
  5. Click on the "Scope" tab
  6. Under the "Remote IP address" section, select the option "These IP addresses:"
  7. For each IP address or range that should have access, click "Add..." and enter the correct ranges.
  8. Once you have entered all the ranges that should have access, click "OK" to save the rule.

If you wish to restrict the LDAP over TCP or the Secure LDAP service for security reasons, you may also wish to modify these rules using the same steps above:

  • Active Directory Domain Controller - LDAP (TCP-In)
  • Active Directory Domain Controller - Secure LDAP (TCP-In)

If you are running an LDAP server on Linux, you should modify your LDAP server configuration in accordance with its documentation to disable or restrict LDAP over UDP, or configure your system firewall accordingly.  Steadfast does not currently support any standalone LDAP servers or any products with an exposed LDAP server.

For advice on how to adjust a server to prevent LDAP amplification or limit the IP ranges that can make LDAP queries, or any other questions about the topics discussed in this article, please visit our Help Desk or email us. LDAP configuration on Windows servers is covered under managed services.

Preventing memcached Amplication Attacks

In 2018 we have seen a large number of DDoS attacks making use of unsecured memcached services running on the internet.  On some Linux distributions memcached servers default to listening on all network interfaces, including those facing the internet.  Exposing the service puts servers at risk of participating in an amplification attack and may expose some sensitive information stored by the application using memcached. This attack queries memcached servers for large results using a fake source address. This request causes the response to go back to the faked address, resulting in a large amount of data being sent to a computer that did not request it. This effect, when used with thousands of memcached servers, directs a very large amount of traffic to a single IP to form an efficient distributed attack.

If you are using memcached only with an application running on the same server, you should configure the service to listen only on the local interface so that it can never be exposed on the internet.  To do this:

On CentOS:

  1. Edit the file /etc/sysconfig/memcached
  2. Find the line that begins with OPTIONS= and add -l 127.0.0.1 between the quotation marks.
  3. If there is no such line, add one that says OPTIONS="-l 127.0.0.1"
  4. Restart the service by running the command
    service memcached restart

On Debian or Ubuntu:

  1. Edit the file /etc/memcached.conf
  2. Find the line that begins with -l and make sure it reads -l 127.0.0.1 
  3. If there is no such line, add one at the end of the file that says -l 127.0.0.1
  4. Restart the service by running the command
    service memcached restart

If you are running an application on another server that needs to connect to memcached, you should configure the server firewall to only accept connections on port 11211 from IP address ranges of application servers that need to connect to this server.

If you aren't using memcached, you should remove or disable the software. To remove it:

On CentOS:

yum remove memcached

On Debian or Ubuntu:

apt-get remove memcached

For advice on how to adjust a server to prevent memcached amplification, or any other questions about the topics discussed in this article, please visit our Help Desk or email us.  memcached is not supported software, but our support team can assist with firewall and package management to disable or restrict access to it.

Preventing NTP Amplification Attacks

In Febuary 2014, the Open NTP Project identified many addresses on our network that were of moderate to severe risk of participating in a NTP amplification attack. This attack queries NTP servers for large results using a fake source address. This request causes the response to go back to the faked address, resulting in a large amount of data being sent to a computer that did not request it. This effect, when used with thousands of NTP servers, directs a very large amount of traffic to a single IP to form an efficient distributed attack. The Content Delivery Network, CloudFlare, was recently the victim of an attack using this technique.

You can confirm your server is affected by querying the server from a Linux or Mac command line on a separate computer:

ntpdc -n -c monlist <server ip>

or

ntpq -c rv <server ip>

If the result to either of these commands is not “timed out, nothing received” then your server allows queries that it should not.

On servers running GNU/Linux CentOS version 5 or version 6, the problem usually can be resolved simply by restricting the types of NTP queries that are permitted by default.  This can be done in the /etc/ntp.conf file with the following:

restrict default kod nomodify notrap nopeer noquery
restrict -6 default kod nomodify notrap nopeer noquery

The NTP service will need to then be restarted for the change to take effect.  This can be done on CentOS by running as root:

/sbin/service ntpd restart

For advice on how to adjust a server to prevent NTP amplification or limit the IP ranges that can make NTP queries, or any other questions about the topics discussed in this article, please visit our Help Desk or email us. NTP consulting is covered under managed services.

Preventing SNMP Amplication Attacks

Recently, a large number of DDoS attacks have begun to make use of unsecured SNMP services running on the Internet.  SNMP services have a default community (authentication name) called "public" which can be used to return some read-only monitoring statistics about a server.  Exposing the "public" community puts servers at a moderate to severe risk of participating in an SNMP amplification attack and may expose some information that makes them easier to exploit, such as the version of Linux being used and the network configuration. This attack queries SNMP servers for large results using a fake source address. This request causes the response to go back to the faked address, resulting in a large amount of data being sent to a computer that did not request it. This effect, when used with thousands of SNMP servers, directs a very large amount of traffic to a single IP to form an efficient distributed attack.

You can confirm your server is affected by querying the server from the local command line, or from a separate computer's Linux or Mac command line (with the net-snmp package installed):

snmpwalk -v 2c -c public <server IP>

If the result of these commands is not “Timeout: No response from <server IP>” then your server allows queries that it should not.

If you have full management, our monitoring system needs SNMP but does not need the "public" community.

If you aren't using SNMP (and you don't have full management) on your server, we recommend you remove it:

CentOS:

yum remove net-snmp

Debian, Ubuntu or Jumpbox:

apt-get remove snmpd

If you have full management, you should instead edit the file /etc/snmp/snmpd.conf and remove or comment (place a # before) the line that reads:

com2sec notConfigUser default public

Then run:

service snmpd restart

If you are using SNMP for some purpose, please change the /etc/snmp/snmpd.conf to not expose the community "public" to the Internet. Use a random string that's at least 16 characters long. You can replace the community in the config file on the line described above by changing the word "public" to something else. If this is a switch or other network device, rather than a server, please disable the default "public" community setting for your switch and change the community name if you need to monitor the switch.

Please also note that this is not SMTP (an email service), it is SNMP (a monitoring service). Your server was not hacked by this activity, so unless you see further reports, the problem should be resolved with one of the actions indicated above.

For advice on how to adjust a server to prevent SNMP amplification, or any other questions about the topics discussed in this article, please visit our Help Desk or email us. SNMP consulting is covered under managed services.

PXE services

Configuring BIOS for booting PXE menu

To use the PXE option, you will first need to make sure it is enabled in the BIOS.

  1. Tap the “DEL” key until the BIOS screen comes up.
  2. Once the BIOS screen comes up, press the right arrow so the “Advanced” screen is shown.
  3. Arrow down until PCI/PnP or PnP Configuration is highlighted and then press enter.
  4. Highlight the first/primary Onboard LAN/NIC Option ROM and hit enter
  5. Use Up/Down arrow to set the Option ROM setting to “Enabled” or “PXE” and then hit enter
  6. Press ESC key to return to the Advanced menu
  7. Press the Right arrow until the Exit screen is selected
  8. Select “Save Changes and Exit” and hit enter
  9. System will restart, during the restart tap the “DEL” key until the BIOS screen comes up.
  10. Press the Right arrow until the Boot screen is selected
  11. If a menu appears, select “Boot Device” to get the device boot order
  12. Make sure that “Network” or “IBA GE” is selected to boot first
  13. If the “IBA GE” appears below “Excluded from boot order” then highlight the device and then press the “X” key to make it a selection item in the boot order.
  14. If the maximum number of devices are already selected (some systems have a max of 8), then use the “X” key on one of the devices not required to remove it to the Excluded list. You will then be able to add the IBA GE to the included list.
  15. If there is multiple IBA GE devices listed, make sure the one with the lowest Slot number is selected as the first boot item. You can also select to have all the IBA GE devices listed at the beginning of the boot order.
  16. Once done changing the boot order, press ESC to return to the Boot menu
  17. Then press Right arrow to select the Exit screen
  18. Select “Save Changes and Exit” and hit enter

If PXE is correctly enabled in the BIOS, then during the boot process you should get something similar to:

Initializing Intel(R) Boot Agent GE vx.x.xx
Copyright (C) 19xx-20xx, Intel Corp CLIENT MAC ADDR: 00 11 22 33 44 55 GUID: 12345678 1A2B 3C4D 5F60 123456789ABC
DHCP.../

If after re-configuring the BIOS you do not get this PXE/Boot agent initialization message, then contact support@steadfast.net for assistance in getting this problem corrected.

During the boot, the “DHCP...” at the bottom of the initialization message should be replaced by:

CLIENT IP: x.x.x.x MASK: 255.255.255.192 DHCP IP: 208.100.0.212
GATEWAY IP: x.x.x.y
TFTP...

If instead you get “No DHCP or proxyDHCP offers were received.” then contact support@steadfast.net about having the server's manual registration with the DHCP server added. Also, customers that have been assigned their own network Vlan may need to request the DHCP services be added to their Vlan on the Steadfast routers.

If instead you get “Media test failure, check cable” then contact support@steadfast.net for more assistance with this issue.

Brief description of PXE menu options

If PXE is successful, then the Steadfast Networks PXE menu should appear which will be divided into two major sections of “INTERNAL MENU” and “PUBLIC MENU.” Of course, the only area of interest for customers is the public menu. If no key is pressed after 10 seconds then the boot process will continue. As a result, the PXE menu can be left in the BIOS boot order while still allowing a production system to proceed to booting the installed OS from the hard disk. From the PXE menu, for re-installing the Operating System (OS), there is the option of Windows 2003/2008, FreeBSD, GNU/Linux (such as CentOS and Debian), Automated GNU/Linux installs. There is also an option of Live/Rescue Discs.

OS installs via PXE

Windows 2003/2008


The option of Windows 2003 and 2008 is available to all customers but does not provide any license key. If you require a Windows server license from us for a server that previously did not have Windows installed, then additional monthly charges for the license will apply. Also, if you change the edition of Windows (such as going from Web edition to Standard edition) then that will also result in additional licensing fees. More information about the monthly charges for software licensing is available from the Steadfast Networks website.

FreeBSD


FreeBSD option provides access to the FreeBSD installer via a RAM disk acting as a virtual hard disk or virtual CD-ROM ISO image. The operating system is very sensitive to the type of hardware and on several systems running the installer via PXE will fail. Instead, customers can attempt to use the IPMI virtual CD-ROM to perform the install. It is also possible to request the Steadfast support staff connect a USB DVD with the FreeBSD install media to the server. When installing from PXE, the installer will request the location of the FreeBSD install media of which Steadfast has it available via NFS. These NFS locations are:
FreeBSD 8.0 32-bit 208.100.0.212:/tftpboot/os/freebsd/8.0
FreeBSD 8.0 64-bit 208.100.0.212:/tftpboot/os/freebsd/8.0-amd64
FreeBSD 8.1 32-bit 208.100.0.212:/tftpboot/os/freebsd/8.1
FreeBSD 8.1 64-bit 208.100.0.212:/tftpboot/os/freebsd/8.1-amd64

GNU/Linux (manual install)


The manual GNU/Linux distribution installer menu provides option to install CentOS and Debian GNU/Linux distributions. Other non-supported distributions are provided such as Fedora and Ubuntu but not recommended for production servers. Choosing from this menu also provides the flexibility of changing install options such as partition sizes and choosing what hard drives to use during the install. Once the install completes, please be sure to read the notice regarding control panel installation below before proceeding with using the newly installed system.

GNU/Linux automatic install


The automated GNU/Linux install menu uses preset install options that fits the needs of the majority of customers. Before being able to proceed with the install, there will be a password prompt to help make sure you have not selected this option by accident. The password for the automated install menu is CONFIRM in all capital letters. You should then be able to select between CentOS and Debian along with selecting between 32-bit or 64-bit installs. Just as with manual GNU/Linux installs, once the install completes, it is important to read the notice below regarding control panel installation before proceeding with using the newly installed OS.

Important notice for customers with control panel license


Once the install via PXE is complete, only the OS will be installed--no control panel is automatically installed via PXE. If you are leasing a control panel license (Interworx, cPanel, Plesk, etc), please contact support@steadfast.net and request that we install the control panel for you. The control panel installer assumes it is installing to a freshly installed OS. If you make changes to the OS after the install, we can not guarantee the control panel will install correctly. Also, the control panel installer may overwrite any changes you make.

Live/Rescue disk

Under Live/Rescue disks, we have several GNU/Linux OS rescue options which run from the network instead of booting from the hard disk. This menu includes CentOS rescue images, KNOPPIX, R1Soft baremetal recovery. The CentOS rescue images are periodically updated and should work with the majority of hardware used in our dedicated servers. The KNOPPIX provided is old and may not work on all system. This option is useful to our staff as the image includes an OpenSSH server and also include NTFS support. The R1Soft baremetal recovery image is designed to be used by customers that use the Steadfast Networks CDP backup service. This can do a complete restore of the most recent backup without having to re-install the OS first. Also included in the Live/Rescue disks section is the Ultimate Boot CD (and an older version known as PXEKnife). Majority of the options have not been tested with the Steadfast Networks servers and may not work as expected. However, some of the options can be helpful for troubleshooting. It does include Memtest86+ as well as some tools for wiping a disk drive. There are alternative methods of also accomplishing the same sorts of tasks as provided by the Ultimate Boot CD. We can not guarantee that the specific applications provided by the Ultimate Boot CD will work with your Steadfast dedicated server, but if you contact the support staff, we should be able to assist you in finding a method of accomplishing the same task.
Querying Spamhaus DNSBL Returns No Results (NXDOMAIN)

Spamhaus provides a set of managed block lists to assist with identifying and blocking IP addresses and domain names that are likely to send out spam or cause malware infections.  These lists are available via the spamhaus.org web site as well as via the DNS-based Block List (DNSBL) standard.  To limit the load on their infrastructure, Spamhaus only permits users to query the service for non-commercial purposes and sets a cap on the number of daily queries allowed.

As of August 2016, due to the fact that Steadfast is a commercial business and has a high volume of DNS traffic, Spamhaus has requested that we reject all queries to the DNS block lists via our public resolvers.  This means that instead of fetching a usual DNSBL response code, the resolver will return NXDOMAIN, which indicates no result is available.  This response should not cause any issues for mail servers using Spamhaus services, except that they will no longer be able to use the block lists for filtering email.

We cannot grant exceptions to the query restrictions on our public DNS resolvers.  It is not possible for Steadfast to meet the usage terms of the free DNS feed and we cannot reasonably meter the usage of the paid feed to provide a bundled version to our customers.

If you need the data from Spamhaus as part of an anti-spam effort or product, you have two options.  You may either run a DNS resolver locally on your server to query the DNS block lists directly if you meet the free feed criteria, or you may contact an authorized Spamhaus reseller to gain access to the paid version of the data feed intended for commercial use and high-volume consumption.

For more information on the data feed and its restrictions, please see the following web site:

  • https://www.spamhaus.org/organization/dnsblusage/

If you have questions about how to run a local DNS resolver, please feel free to contact us.

Reducing Memory Usage

If your server or VM is frequently running out of memory this article should be of great assistance to you and will guide you through diagnosing what the issue is as well as listing some possible fixes.

First of all, to see how much memory you are currently using, run free -m. It will give you output such as:

             total       used       free     shared    buffers     cached
Mem:           363        354          9          0         46        137
-/+ buffers/cache:        170        193
Swap:         1023         53        970

The "used" value (354) will almost always be close to the total memory (363) in the system. This is because Linux uses spare memory to cache data in order to reduce the reliance on the hard drive. Here 137MB are being used for cache. You can read more about this in the "Why is so much memory in use on my server when nothing is running?" article.

The main thing you're going to want to look at is the "-/+ buffers/cache:" used value (170). That is the actual amount of memory your applications are currently using. For best performance, this number should be less than your total (363) memory and in order to prevent out of memory errors, it needs to be less than the total memory (363) and swap space (1023).

ps

In order to see where all your memory is going, just run ps aux. That will show the percentage of memory each process is using (in the %MEM column) and you can use it to identify the top memory users (usually Apache or MySQL). Remember to add together all instances of the service to calculate how much memory the service is using as a whole.

Resolving: High Apache Memory Usage

Apache is often one of the biggest memory users. Apache is run as a number of 'servers' and incoming requests are shared among them. The memory used by each server grows, especially when the web page being returned by that server includes PHP or Perl that needs to load in new libraries, and it is no uncommon for each server process to use as much as 10% of a server's memory.

In order to reduce the memory usage you can reduce the number of servers by editing your httpd.conf file. There are three settings you are going to want to look at: StartServers, MinSpareServers, and MaxSpareServers. Each can be reduced to a value of 1 or 2 and your server should still respond promptly. After changing the settings in the httpd.conf file be sure to restart Apache by running "service httpd restart" to assure the new settings are in effect.

Resolving: High MySQL Memory Usage

MySQL is relatively memory efficient on install as most memory intensive features are not enabled by default, but you can add the following lines to the /etc/my.cnf file, under the mysqld section, to free up some additional memory:

innodb_buffer_pool_size = 16k
key_buffer_size = 16k
myisam_sort_buffer_size = 16k
query_cache_size = 1M

Again, make sure you restart the service for those settings to take affect. This can be done by running "service mysql restart"

Resolving: High SpamAssassin Memory Usage

SpamAssassin can also be a major memory user as it can create multiple threads/processes and each of those threads can use a good amount of memory, but SpamAssassin normally works very well with just one thread. You can reduce the 'children' setting and reclaim some memory on your server for other apps to run with.

To do this change the SPAMDOPTIONS line in the /etc/init.d/spamassassin file to:

SPAMDOPTIONS="-d -c -m1 -H"

Final Solution: Add Memory

A simple solution to resolving most out of memory problems is to add more memory. If you'd like to increase the memory on your VM, just modify your VM directly from your control panel at https://vm.steadfast.net/ and if you have a dedicated server simply email us at sales@steadfast.net in order to get an upgrade.

Securing SSH While Allowing Steadfast Support Access

There are a few common ways to restrict SSH access to your server but still allow our technicians to access your server.

Changed SSH Port or Requirement to Use sudo or su

In this case, please do the following:

  1. Log into the management interface.
  2. Click on "Device Manager"
  3. Click on the server that is affected by your changes.
  4. Click on "Edit" link on the "Device Metadata" section.
  5. Input the changes in port, username, password, and any additional login directions that might be needed.

Firewalled or Restricted SSH connections to certain IP ranges

In this case, please be sure to allow the IP ranges:

67.202.100.0/23 (Chicago Offices)
10.252.0.0/24   (Edison, NJ Office)
10.254.4.0/24   (Corporate & Engineering Office)
2607:f128::/48  (For IPv6)

SSH Public Key Authentication Only

For CentOS Systems: We now have an RPM that can be installed to handle this automatically. See the following knowledge base article: Adding Support Staff SSH Keys using RPM.  If you use this method, the keys will update automatically when we publish a new version.

If you are not using CentOS or wish to maintain the list of keys manually, you can find the current key file here.

To use it, download and place the file at /root/.ssh/authorized_keys2 on your server.

Note: As our staff changes, we will update this list of keys.  We recommend that you check the file at the link above periodically for a new version.  The modification date is always listed in the comment at the top of the file.

Setting Up iSCSI Filesystems
This document describes how to set up a new iSCSI mount point on a Linux system. These directions will assume you are running CentOS 5 or 6.

Note: Replace any text in angle brackets (including the brackets) with the value provided or determined earlier in the procedure. For example, you would replace "<TARGET NAME>" with the target name provided by support when your mount point is set up.

Prerequisites

Prior to deployment, you need to identify the Initiator Name setting for any systems that will use the SAN. Run the following to get the correct value:

# cat /etc/iscsi/initiatorname.iscsi
InitiatorName=iqn.1994-05.com.redhat:abcd12345678

Provide the result of the command to support, which will allow us to complete the configuration. Once the volume is ready, you'll be given the relevant connection information to use in the following section. A connection to our Internal Network is required for SAN access, so make sure you have arranged for access on any systems you wish to mount your volume to.

Configure the iSCSI service to log into the SAN

You can check for existing iSCSI sessions by running the following command:

iscsiadm -m session
tcp: [0] <HOST IP>:3260,1007 <TARGET NAME>

If you are adding a new type of mount (SAN vs SATA) or have not set up any iSCSI mounts before, run these commands:

iscsiadm -m node -p <HOST IP>:3260 -T <TARGET NAME> -o new
iscsiadm -m node -o update -n node.startup -v automatic

Enable the iscsi services and start them:

chkconfig iscsid on
chkconfig iscsi on
service iscsid status || service iscsid start
iscsiadm -m node -T <TARGET NAME> --login

If the server is already configured with a connection for the specific mount type, then all you need to do is rescan to identify new devices.

iscsiadm -m node --rescan

At this point you should be able to view the disk information. The best utility for this is "lsscsi" or you can just browse the output of "dmesg"

yum -y install lsscsi
lsscsi | grep NETAPP

From here, note the device node to be used for partitioning. It would likely be something like /dev/sdb.

Set Up Partitioning

In order to avoid the risk of the device node changing names and to allow the filesystem to be enlarged if desired, LVM is recommended. It's easy to set this up. GROUP NAME and VOLUME NAME can be replaced with any name you want to use. If you're not sure, just use "san" as the GROUP NAME, and "0" as the VOLUME NAME.

pvcreate /dev/<DEV NAME>
vgcreate <GROUP NAME> /dev/<DEV NAME>

If only one volume is desired, then:

lvcreate <GROUP NAME> -n <VOLUME NAME> -l 100%

At this point your device will be available at:

/dev/mapper/<GROUP NAME>-<VOLUME NAME>

If you don't want to use LVM, then you'll can either format the whole device or partition it with parted (recommended).

parted /dev/<DEV NAME>
 mklabel gpt
 print                    # note the disk size on the "Disk" line, like "100GB"
 mkpart 1 ext3 0 <SIZE>
 quit

If you do this, your partition would become /dev/<DEV NAME>1. If you used LVM, remember the /dev/mapper/ location and use it below.

Now, format your partition. In most cases, ext4 is a good choice:

mke4fs /dev/<VOLUME>

Add the mount point to the /etc/fstab file. "_netdev" marks the filesystem on RHEL systems to be unmounted before the network is deactivated on shutdown.

/dev/<VOLUME> /<MOUNT POINT> ext4 _netdev,defaults,noatime 0 0

Finally, mount it:

mount /<MOUNT POINT>

Your new iSCSI filesystem should be ready to use! If you run into any problems, please feel free to contact support for assistance.

Shipping Information for Steadfast Datacenters

Below is the shipping information for Steadfast's three datacenters.

Customers shipping hardware to Steadfast should always include their Customer ID# on the shipping label, if at all possible.


350 E Cermak Datacenter

Steadfast
350 E Cermak Rd
Suite 240 West
Chicago, IL 60616


725 S Wells Datacenter

Steadfast
725 S Wells St
8th Floor
Chicago, IL 60607


Edison, NJ Datacenter

Steadfast/NoZone c/o IO Data Center
3003 Woodbridge Ave
Edison, NJ 08837

Troubleshooting Slow transfer speeds to a server
Most slow transfer speeds and performance problems are caused by Internet routing problems. Some of these problems may occur at or near our network, but many occur along the way and are sometimes out of our control. If you are seeing slow performance or packet loss to your server, it is possible that the route your data takes on the Internet is causing the issue.

If you suspect that routing is at fault, please open a support request containing a "traceroute" from your computer (or the affected computer) to your server, as well as a traceroute from your server back to the first routable IP address in the inbound traceroute. Routable IPs specifically exclude any of the following: 172.16.x.x - 172.31.x.x, 192.168.x.x, 127.x.x.x, and 10.x.x.x. If you are having trouble identifying the first routable IP on your inbound traceroute, feel free to send us the inbound route and we will let you know which IP to use for the outbound traceroute command.

To get these traceroutes, open a terminal or command prompt window on your computer. In Windows, type:

tracert <IP>

In Linux, Unix, or MacOS X, type:

traceroute <IP>

Replace <IP> with the IP of your server. Once the command completes, copy the entire traceroute and send it to our support department so we can analyze whether your speed problem is occurring in your route.

Using CloudFlare with cPanel

Installing/Using the CloudFlare cPanel Module

1. Sign-up for a CloudFlare Account: https://www.cloudflare.com/sign-up.html
2. Follow the up-to-date install instructions here: https://www.cloudflare.com/wiki/Cpanel
3. Once it is installed, you can simply use Cloudflare using the Cloudflare icon in the Advanced section of cPanel.

For additional help with CloudFlare you can access their documentation and helpdesk here: http://www.cloudflare.com/help.html

What is CloudFlare?

CloudFlare is a system that acts as a proxy between your visitors and our server. By acting as a proxy, CloudFlare caches static content for your site, which lowers the number of requests to our servers, but still allows visitors to access your site. This automated installer for CloudFlare allows you to setup basic cloudflare protection. The installer is still in beta. There is a risk that it will cause a redirect loop or negatively impact your site. We recommend preforming the installation during low traffic periods.

Advantages of the CloudFlare system:


  • Site Performance Improvement: CloudFlare has proxy servers located throughout the world. Proxy servers are located closer to your visitors, which means they will likely see page load speed improvements as the cached content is delivered from the closest caching box instead of directly off our server. There is a lot of research that shows that a faster a site, the longer a visitor stays.
  • Bot and Threat Protection: CloudFlare uses data from Project Honey Pot and other third party sources, as well as the data from its community, to identify malicious threats online and stop the attacks before they even get to your site. You can see which threats are being stopped through your CloudFlare dashboard here.
  • Spam Comments Protection: CloudFlare leverages data from third party resources to reduce the number of spam comments on your site
  • Alerting Visitors of Infected Computers: CloudFlare alerts human visitors that have an infected computer that they need to take action to clean up the malware or virus on their machine. The visitor can enter a CAPTCHA to gain access to your site.
  • Offline Browsing Mode: In the event that our server is unavailable, visitors should still be able to access your site since CloudFlare serves the visitor a page from its cache.
  • Lower CPU Usage: As fewer requests hit our server, this lowers the overall CPU usage of your account.
  • New Site Stats: You have good tools to evaluate human traffic coming to your site, but no insight into search engine crawlers and threats. With CloudFlare, now you do.

There are some limitations of the CloudFlare system:


  • Currently, requests must be directed to www.yourdomain.tld instead of domain.tld (which means you may need to make some configuration changes: WordPress installations are automatically adjusted).
  • CloudFlare may affect internal statistic programs that read directly from Apache logs. (CloudFlare will not affect web-based analytic programs that use JavaScript like Google Analytics.)
  • While your logs will reflect fewer requests to your server and therefore lower load, the experience to your visitors should be unaffected.
  • CloudFlare caches static content from your site. While this reduces the load on your server, it means that if you make a change to an existing static file, like an image, there may be a delay before the change appears. While you are updating your site, you can put CloudFlare in .Development Mode. so changes appear immediately.
  • CloudFlare's basic mode cannot handle SSL certificates. If you need to use an SSL certificate, that part of your site needs to be on a subdomain that is not protected.
For further reading check out the CloudFlare Wiki, CloudFlare FAQ, and Project Honeypot.
Using Multiple Monitors with Windows Remote Desktop

With our Windows Dedicated Servers most clients manage things over remote desktop protocol (RDP) and we're often asked about using multiple monitors with RDP.

Default settings for connecting to a remote server are typically fine for most users, but those who require multiple monitors for their sessions, such as traders or system administrators, may need to configure RDP to use multiple monitors in their remote sessions.

Reconfiguring remote desktop protocol (RDP) for this is simple and can be done in one of two ways.

  1. The first method is directly through the RDP interface. Open the Remote Desktop and click the "Options" button on the bottom left-hand corner of the window. Click on the "Display" tab and tick the checkbox that reads "Use all my monitors for the remote session" Once this is selected, you can then click "Connect" and proceed with connecting to the server as normal. If you would like this to be the default behavior for RDP, click on the "General" tab and click "Save" before connecting to your remote server.
  2. Alternatively, you can launch RDP from the command line and specify the multimon flag:

    mstsc.exe -multimon

    Launching RDP in this manner will auto-check the "Use all my monitors for the remote session" box and allow you to bypass the previous steps.

Support for multiple monitors is available when connecting from any Windows 7/8.1/10 computer, however, there are restrictions when connecting to a computer using multi-monitor mode. When connecting to Windows 7 computers, only computers that are running Windows 7 Enterprise or Ultimate can be connected to in multi-monitor mode. When connecting to Windows 8.1, only computers that are running Windows 8.1 Professional or Enterprise can be connected to in multi-monitor mode. Both Standard and Datacenter editions of Windows Server 2008, Windows Server 2012, & Windows Server 2016 support multi-monitor mode.

Multi-monitor mode supports up to 16 monitors, with a maximum resolution of 4096 x 2048 per monitor.

Using Windows Remote Desktop

Newly set up Windows servers can be connected using Remote Desktop Connection. This transmits your desktop across the Internet, allowing connection from a remote location.

Connecting from Windows XP

If you are not running the most recent version (7.0) of the Remote Desktop Client, you can download it from the following link: http://www.microsoft.com/download/en/details.aspx?displaylang=en&id=20609 Note that using an out-of-date version of the Remote Desktop Client will cause issues when connecting to a Windows Server 2008 R2 or 2012 R2 system.

If you get the following message:

"The remote computer requires Network Level Authentication, which your computer does not support. For assistance, contact your system administrator or technical support."

you will need to both upgrade to the newest release of the Remote Desktop Client, and either:

  • follow the steps outlined in the following knowledge base article: http://support.microsoft.com/kb/951608/
  • Turn off Network Level Authentication in the Remote Desktop settings on your server. (If you need assistance with this, please contact Support)

To connect:

  1. Click Start, then All Programs, then Accessories, and finally Remote Desktop Connection.
  2. In the Remote Desktop Connection dialog box, enter your server's Main IP address in the Computer: field
  3. Click Connect
  4. When prompted, enter your Username ("Administrator" by default) and password.


You are now connected to the remote server.

To disconnect:

  1. Click Start, and then Log Off

Connecting from Windows Vista or Windows 7

Both Windows Vista and Windows 7 should already have an up-to-date Remote Desktop client installed that can connect to Windows 2008 R2 or 2012 R2 systems.

To connect:

  1. Click the Windows logo in the lower left corner of your screen, then All Programs, then Accessories, and finally Remote Desktop Connection.
  2. In the Remote Desktop Connection dialog box, enter your server's Main IP address in the Computer: field
  3. Click Connect
  4. When prompted, enter your Username ("Administrator" by default) and password.
  5. If you get a warning that says "The identity of the remote computer cannot be verified", check the "Don't ask me again for this computer" box, and click Yes


You are now connected to the remote server.

To disconnect:

  1. Click Start, and then Log Off

Connecting from Windows 8.1

Both Windows 8.1 should already have an up-to-date Remote Desktop client installed that can connect to Windows 2008 R2 or 2012 R2 systems.

To connect:

  1. Click the Windows logo in the lower left corner of your screen, type in Remote and click on Remote Desktop Connection. You can also right-click on the icon and pin it to either your start menu or taskbar for easier access moving forward
  2. In the Remote Desktop Connection dialog box, enter your server's Main IP address in the Computer: field
  3. Click Connect
  4. When prompted, enter your Username ("Administrator" by default) and password.
  5. If you get a warning that says "The identity of the remote computer cannot be verified", check the "Don't ask me again for this computer" box, and click Yes

You are now connected to the remote server.

To disconnect:

  1. Click Start, and then Log Off

Connecting from Mac OS X

Install the Remote Desktop Client for OS X

If you have not yet done so, download the Remote Desktop Connection Client for Mac from the following link: http://www.microsoft.com/mac/remote-desktop-client. After downloading the software, install it before proceeding.

To connect:

  1. Click the Finder icon in the dock, open Applications, and then double-click on Remote Desktop Connection
  2. In the Remote Desktop Connection dialog box, enter your server's Main IP address in the Computer: field
  3. Click Connect
  4. When prompted, enter your Username ("Administrator" by default) and password.

You are now connected to the remote server.

To disconnect:

  1. Click Start, and then Log Off
VRRP and HSRP Redundancy for VLANs
This article explains how and why we use VRRP or HSRP on VLANs we assign to our customers, as well as the implications and limits this may impose on services.

What are VRRP and HSRP?

HSRP is the "Hot Standby Router Protocol" and VRRP is the "Virtual Router Redundancy Protocol." Both protocols allow two routers to be used to provide a single gateway address in a VLAN. If ever one of the routers should fail or lose its connection, the other router will take over the gateway and keep the VLAN operating. HSRP is a protocol that is proprietary to Cisco network equipment. VRRP is a standardized protocol supported by multiple vendors. Certain models of Cisco equipment support only HSRP.

We generally prefer to use VRRP, but we will use HSRP in situations where VRRP is not supported. Both provide an equivalent level of redundancy.

Technical Considerations

Due to the way VRRP and HSRP function, each router that participates in the protocol on a VLAN must have an IP address of its own, separate from the gateway. This means if VRRP is enabled, we will need to reserve an extra two IP addresses. Usually, we claim the two IPs that immediately follow the gateway, but we can use any addresses in the subnet. As the size of the subnet increases, the number of IPs used does not. Five IPs will always be reserved: the network identifier, gateway, broadcast and two router IPs. For each new subnet added to a VLAN, we will reserve 5 IPs in that subnet as well. All the remaining IPs will be usable for customer equipment.

In order to provide constant monitoring of the VLAN state, there will be continuous broadcast traffic between the two routers on the VLAN, checking to see if the other is still available. This broadcast traffic is usually harmless, but will be visible in network traffic monitoring on any system within the VLAN. You can feel free to filter or drop this traffic from your own equipment without affecting the redundancy of the routers.

Some equipment you use inside your VLAN may offer the ability to use VRRP to provide redundancy of its own. If you plan to set up redundant equipment using VRRP, it is important that you contact our network operations team first via a support ticket. Each VRRP instance in a VLAN has a unique identifier which determines the hardware address used by that IP address. If your equipment uses the same ID number as our routers, it may cause VRRP to fail or cause other equipment on your VLAN confusion as to which device is the router. We will be able to let you know which ID(s) you can use to prevent interference with the existing configuration. Only one device on a VLAN can use a specific hardware address safely.

What if I don't want VRRP or HSRP?

VRRP or HSRP are preconditions for our Service Level Agreement regarding network connectivity. While we can disable them on request, doing so will introduce a single point of failure into your VLAN. We will not be able to honor any compensation requests due to network outages that could have been avoided by having VRRP or HSRP enabled.

Welcome Email Information (Dedicated Server)
This article is a reproduction of a standard Steadfast Networks welcome email sent to new dedicated server customers. If you have lost your welcome email, you can use this information as a reference for service features and addon services you are eligible to request.


NOTE: Please read this message completely, as it contains important information about your new service with Steadfast Networks.

== Server Details ==

Your IP addresses and login information are sent in this section.

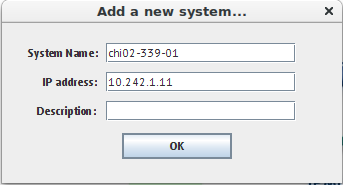
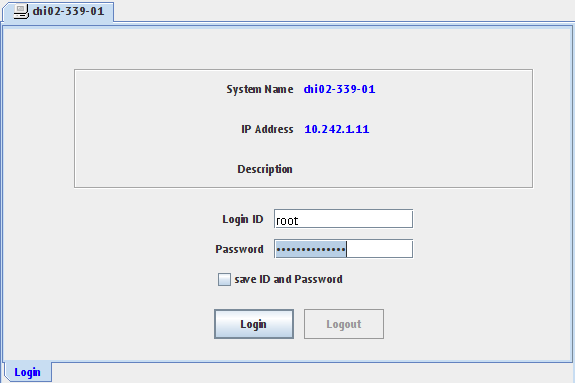
If included, your original email would indicate whether your server provides IPMI management and access to our Internal Network. The presence of IP addresses on your device entries at https://manage.steadfast.net will also confirm whether these features are available on your server.

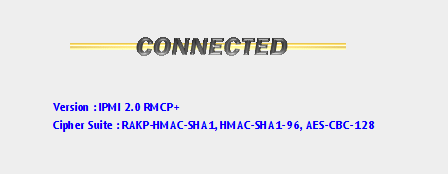
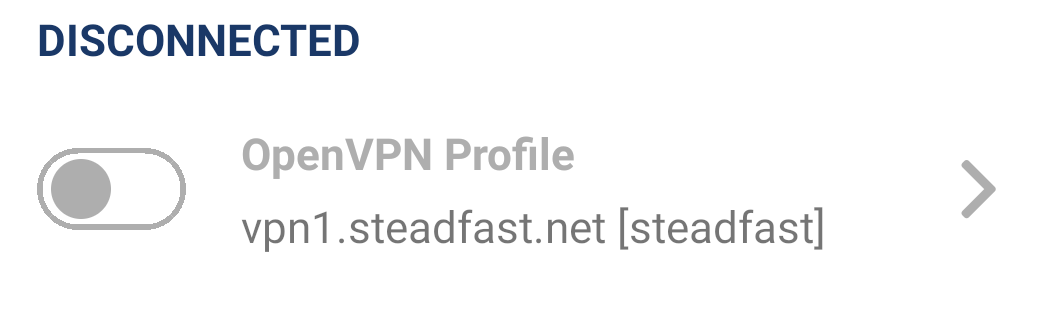
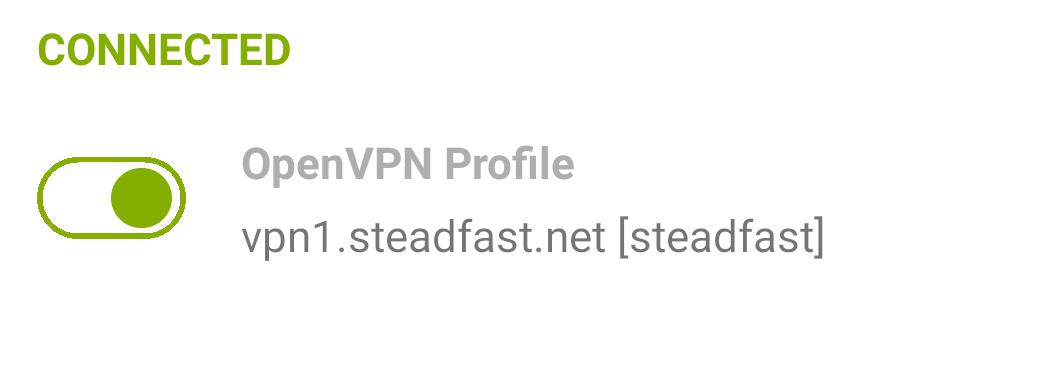
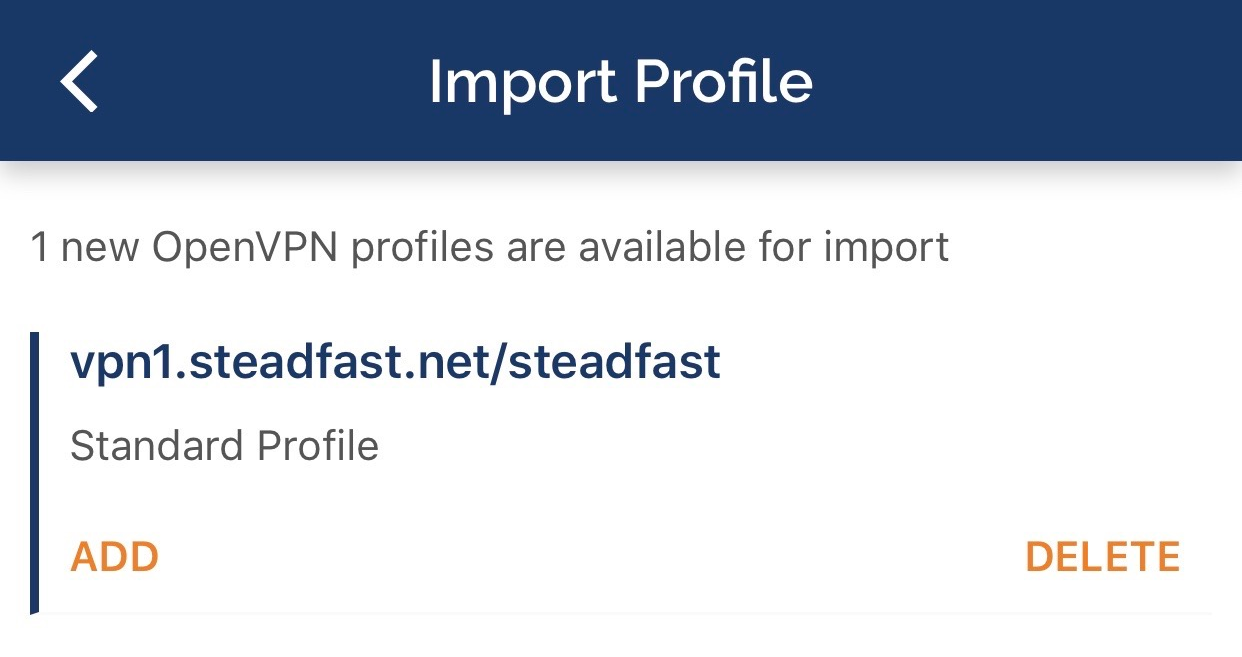
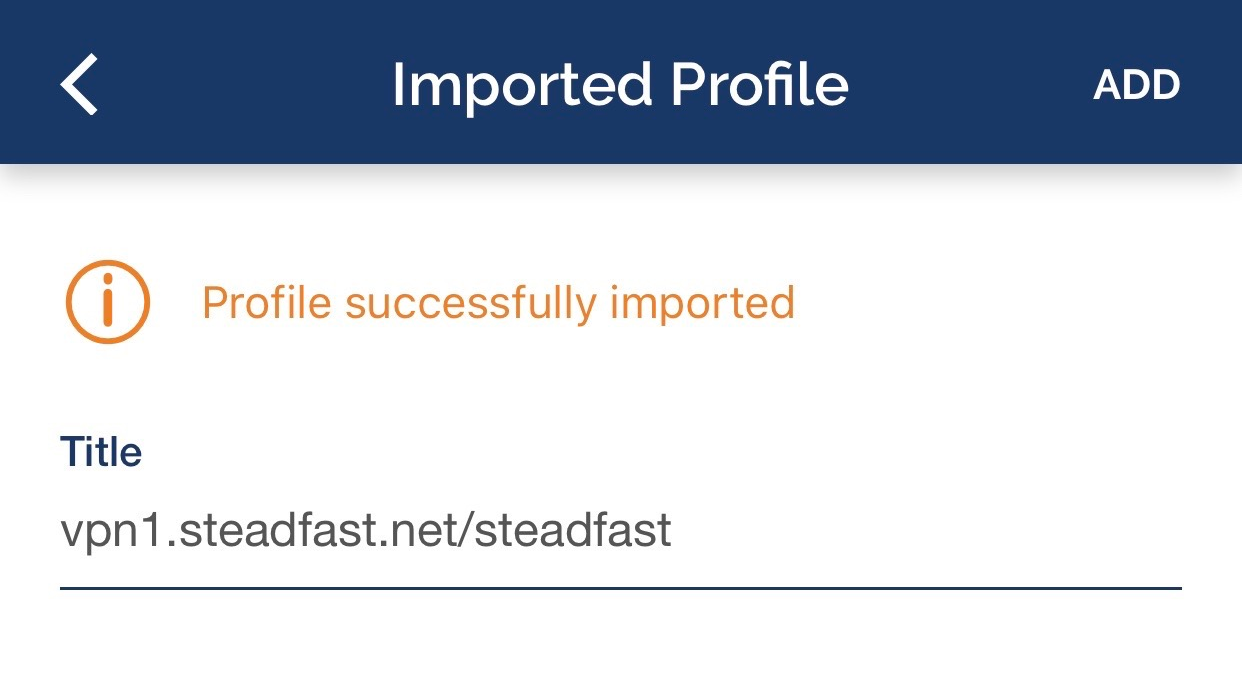
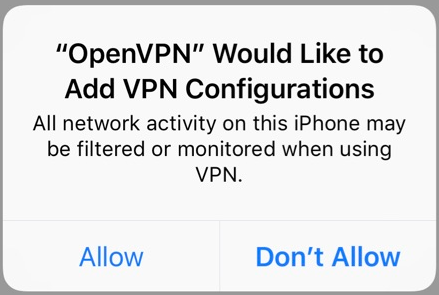
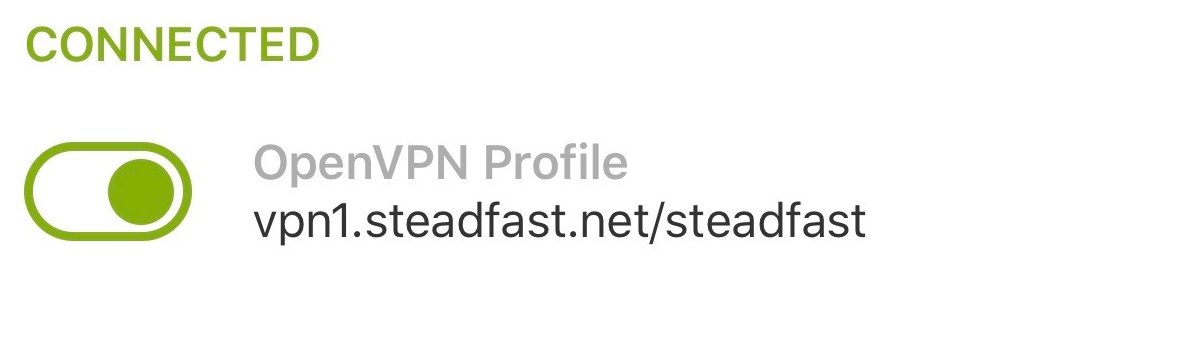
To access IPMI, you must use the Internal Network VPN service described below.  Once connected, you can access IPMI with the provided details.

The Internal Network allows you to communicate with your other servers and the Steadfast SAN privately and unmetered.  If you have a backup account with us, you can use the Internal Network to avoid charges for bandwidth used to make backups.  If you use the shell backup server (SFTP, FTP, or rsync), connect to int.shell01.backup.steadfast.net (10.2.255.10).  If you are using Idera Server Backup, allow access from int.cdp01.backup.steadfast.net (10.2.255.11).

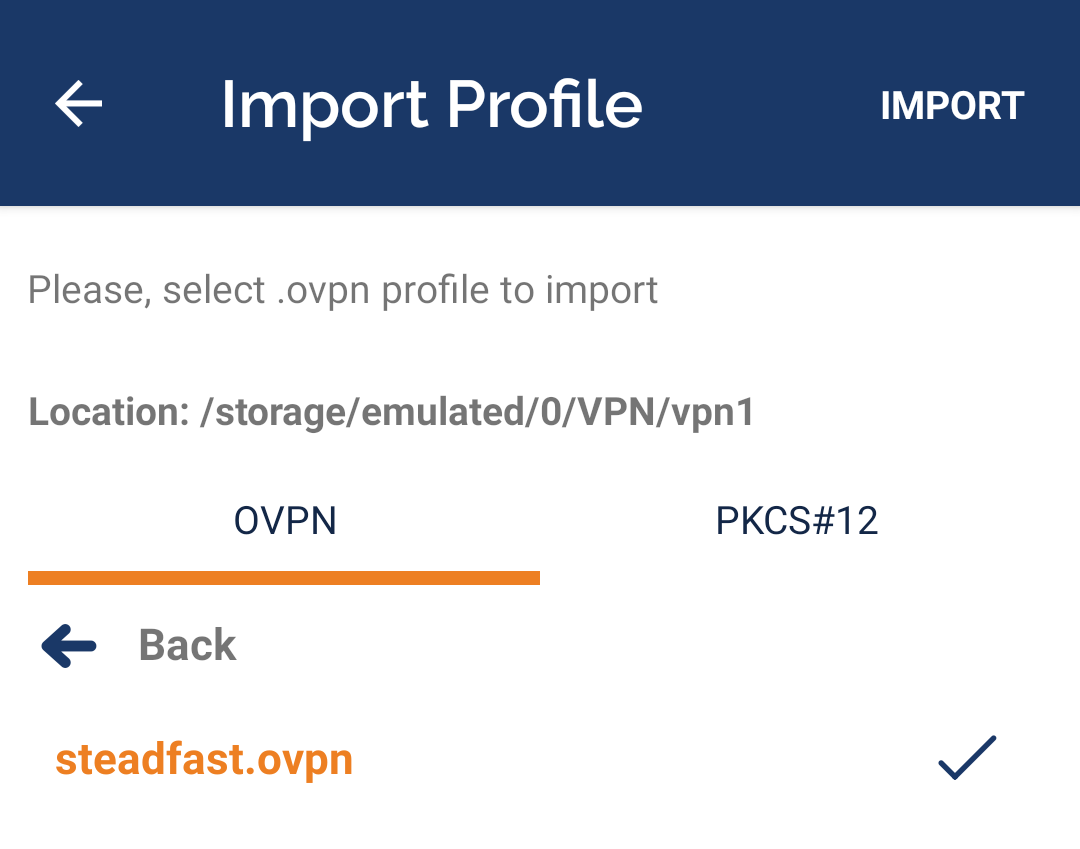
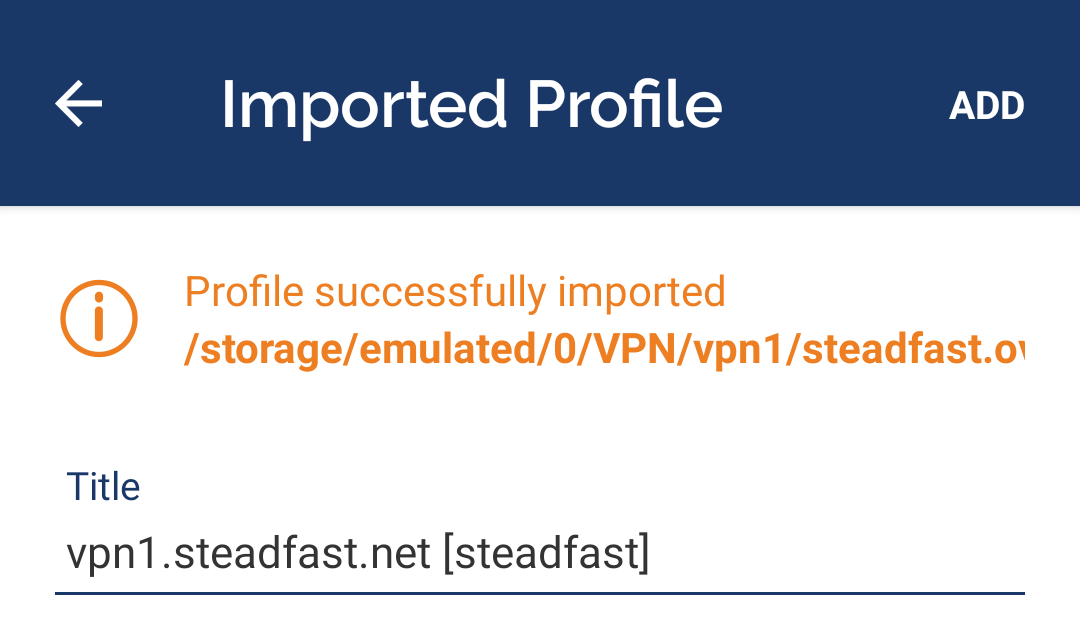
If you would like access to IPMI or the Internal Network via VPN, please contact support@steadfast.net to request a VPN key.  The VPN is supported on Windows Vista and later, MacOS X 10.4 and later, Linux, and FreeBSD.  VPN access is also available on devices powered by iOS 6 and later or Android 4.0 and later.  Please see http://steadfast.net/support/kb/58 for more information.

== Requested Software ==

This section describes the login information for any control panels or additional software you requested in your initial order.

== Account Details ==

You can access our billing and account management interface at the following URL (or you can log in from the login box at the top of any page of our main site) using the information previously sent to you. Your client ID is your login.

URL: https://manage.steadfast.net

== Additional IP Addresses ==

Please note that unless otherwise requested, we have allocated only one IP address to your server. We strongly recommend against using the primary IPv4 address for public services in most cases. By using secondary IPs instead, your server may be easier to access in case of an attack against it. Additionally, if you desire to change between different server offerings in the future, the primary IPv4 address must be changed. Up to 8 additional IPs may be requested at no charge by sending an email to ips@steadfast.net. Secondary IPs beyond the first 8 can be ordered for an additional monthly fee as long as they can be properly justified according to ARIN rules.

The same process and conditions apply to additional IPv6 addresses for your server. Currently, IPv6 allocations are free, and the default is to assign a /64 (1.6x10^19 addresses) on request. We will reserve a /56 allocation which can be configured and routed for you later as needed. The only justification needed to reserve a /56 is simply a request for IPv6 connectivity. We are unable to furnish multiple /56 allocations until the first is efficiently allocated, and we cannot fulfill requests for diverse (discontiguous) allocations.

If you would like us change the reverse DNS entries for your IPs, please send an email to dns@steadfast.net.

Please note that due to the way we allocate IP addresses, all requests must be reviewed and processed by a network engineer. This means that these allocations are processed during a limited window of 9 AM to 7 PM, Monday through Friday. Most requests submitted over the weekend will not be handled until 9 AM on Monday morning. Our technicians cannot generally escalate requests to be processed over the weekend and cannot guarantee a response time on such requests. Be sure to submit your requests during the normal working hours for the department to ensure a fast response. Reverse DNS requests are processed 24/7, but may be lower priority than standard support requests.

== Remote Reboot ==

If your server ever stops responding, you can access "Reboot Control" under individual servers within your "Device Manager" in our management system. This will allow you to power cycle and reboot your server without the intervention of a technician. Please note that if your server is responding, you should reboot it via the operating system, so as not to cause any data loss.

== Server Monitoring ==

All Basic Management systems can have one system monitor per device. This can be a ping monitor, HTTP monitor, SSH monitor, etc. Outage notifications are emailed to the address of your choosing. Full Management customers can have an unlimited number of system monitors and notifications of outages are sent to our support department, along with any instructions you specify. If you would like a monitor to be set up, please email monitors@steadfast.net with the name or IP of the system(s) and service(s) you want monitored along with the email address that should be notified, if you have Basic Management, or the necessary instructions, if you have Full Management.

For any server with a hardware RAID array, we can also setup email monitoring to alert you, with basic management, or to alert us, with full management, regarding potential issues with your RAID array. This can help prevent catastrophic failures and is highly recommended. The RAID monitor will not count as a service monitor on your account and can be setup by emailing support@steadfast.net.

To protect the stability of your server and avoid interfering with your software configuration, we do not configure automatic or proactive updating by default. Please be sure to contact us if you would like us to turn on automatic installation of updates or have notification of updates sent to a particular address. This may require periodic reboot of your server. If your service is fully managed, you may have notifications sent to our support staff, so that we may take proactive action. If we are notified of an update that requires a reboot, we will contact you to schedule it.

== Remote Backup Service ==

We offer 10 GiB of backup space to all Basic Management customers and 50 GiB to Full Management customers at no additional charge.  Idera Server Backup software is also available for an additional $10 a month per Basic Management system and is available for free with Full Management systems. To read about all the features included with the Idera Server Backup software or to see other available backup options go to http://steadfast.net/services/backup.php. To request your backup space, please submit an email to backup@steadfast.net from one of the authorized email addresses on your account specifying whether you want a standard SSH/FTP/rsync backup account or an Idera based account and we will create an account for you.

== Enterprise Spam Filtering ==

We offer access to an Enterprise Spam Filtering appliance to any customers that wish to use it. This service is included with Full Management, and is otherwise $29.95 per month per 250,000 messages for Basic Management or colocation customers. If you would like to have this service activated for your account, please send an email to spamfilter@steadfast.net listing the domains you would like to set up.

== Announcements and Maintenance ==

As many of our customers have expressed that they do not want to receive service notices to the primary contacts within their accounts, we do not notify customers of most routine maintenance and service changes via email.  If you would like to be notified when we post an announcement, please visit the following link and enter your email address in the "Subscribe" box on the right side of the page:

https://support.steadfast.net/News/List

You can also click on the RSS icon on the news page to access an RSS feed of announcements via your favorite RSS reader.  We also provide links to recent announcements and company blog posts on our front page if you prefer to check manually.

== Requesting Technical Support ==

For someone to request support on one of your systems, the email address, name, and phone number MUST be listed as one of the contacts on your account. Additional authorized contacts can be added by accessing our management system and clicking "Client Profile," then "View Profile," and then clicking edit at the top of the "Authorized Contacts" section. This is required for security purposes.

To improve support speeds and to improve your overall experience we strongly recommend that you enter the login information to your systems. This data can be entered in the "Device Manager." Under each device, click the "Edit" link for the "Device Metadata" section. This is extremely important if you have Full Management, since if this information is not kept on file and up-to-date we cannot properly implement proactive support services.

If you have any further support questions, please visit our help desk at https://support.steadfast.net, or email support@steadfast.net. Please be sure to list your server's primary IP address and as much detail as possible about your problem when requesting support to ensure faster service.

Thank you for your business!

What is CentOS? Why should I choose it?
CentOS is a community-supported Linux distribution built off the open-source, free packages prepared for Red Hat Enterprise Linux. CentOS is a free edition of the very same software that makes Red Hat an enterprise Linux solution, without the unnecessary cost of an extra support contract in order to gain access to software updates, technical resources, and new releases, services which we provide to you directly.

CentOS delivers the same access to industry standard software including full compatibility with software packages prepared specifically for Red Hat Enterprise Linux systems. It provides the same level of security support through software updates, product lifetime, and performance of other enterprise Linux solutions.

In addition, each major release exactly coincides with a release of Red Hat's distribution, ensuring that CentOS always provides a consistent compatibility with all software packages released specifically by or for Red Hat.

I consent to allow Steadfast to process my data and agree to the Acceptable Use and Privacy Policies

  • 312.602.2689
  • ColoHouse Sales
  • Facebook
  • Twitter
  • YouTube
  • LinkedIn

Services

  • Cloud Hosting
  • Managed Hosting
  • Backup & Disaster Recovery

Solutions By Industry

  • Enterprise Solutions
  • Trading & Financial
  • Healthcare
  • Developers & Startups
© 2023 Steadfast
  • Log In
  • Site Map
  • Legal Info & Privacy Policy